| | Project Number 2: Paint and Body |  |
|
+15ghpcnm J. Chris Davis Karma wee-one bigdave 99Rivman BlownRiv albertj crlombardi69 stan DEMonte1997 Eldo BMD robotennis61 nebstewart07 19 posters |
|
| Author | Message |
|---|
Eldo
Expert

Name : Mark
Age : 59
Location : West Salem, Oregon... FINALLY
Joined : 2009-04-09
Post Count : 3140
Merit : 104
| | Subject: Re: Project Number 2: Paint and Body Tue Mar 01, 2011 2:02 am | |
| What I'd like, and could work with a larger "R" logo on the grill, is NightVision...  | |
|
| | |
stan
Expert
Joined : 2007-07-01
Post Count : 2556
Merit : 12
| | Subject: Re: Project Number 2: Paint and Body Tue Mar 01, 2011 2:23 am | |
| nightvisions are still not cheap to buy,HUDs are in every junkyard.You have to look for a 2000 DeVille and still install it out and inside the car. | |
|
| | |
nebstewart07
Fanatic

Name : Ben Stewart
Age : 34
Location : Schofiel Barracks, HI
Joined : 2010-12-12
Post Count : 390
Merit : 6
| | Subject: Re: Project Number 2: Paint and Body Tue Mar 01, 2011 4:29 am | |
| Yah i mean you would be different. But to me its not worth cutting up your dash and etc to see the seped and blinker maybe if it included other stuff like kr. boost gauge and other stuff like maybe an outside temp that actually worked but by that time you had all of that stuff in front of you you would forget you were on the road lol. The only thing i could see this doing is removing the spedometer on the dash to put something else but what the hell would you put in that gaping hole? maybe 2 or 3 gauges but then you have to come up with some custom plastics and by that time you would be better just to put it in the a-pillar.
But i cant criticize for being different unless you are putting 52 inch rims on a riviera then maybe but it would be cool to see.
One thing i want to do with a riv is put it on a truck frame and lift it and go mudding lol. only in my dreams lol. Now back on subject.
More pics should be comming on wednesday guys. | |
|
| | |
nebstewart07
Fanatic
Name : Ben Stewart
Age : 34
Location : Schofiel Barracks, HI
Joined : 2010-12-12
Post Count : 390
Merit : 6
| | Subject: Re: Project Number 2: Paint and Body Wed Mar 09, 2011 12:40 am | |
| Sorry guys its been awhile since I updated. here are some pics that were shot monday. Should be ready to jam everything tommorow!: Front end with bumper removed, minor dents fixed, and wet sanded: 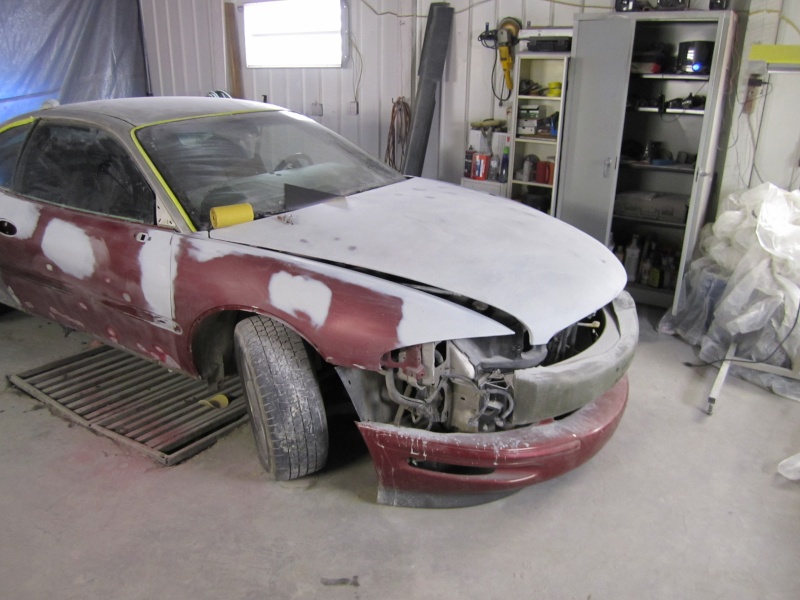 Rear primered the spots that got fixed and then wet sanded  Drivers rear end:  Front end again( igot a new camera so was just messing with it:  Rear bumper getting fixed:  Door had been repainted before and bondoed so just ensuring everything was done correct even though they did not take off the trim so paint was cracking: 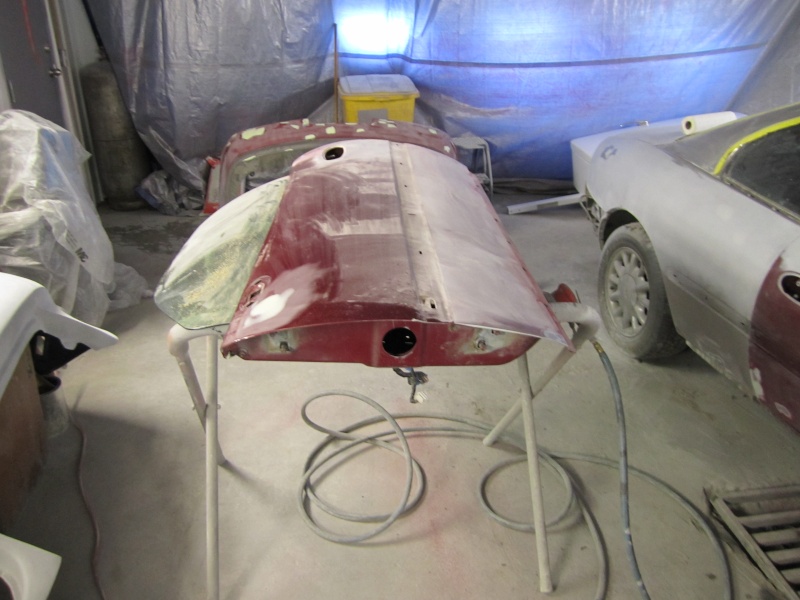 Hood:  Passengers side:  Oh no my interior is getting all dirty! lol:  A couple other things are going to be done such as shaving antenna and shaving the trunk. The blinker lights aregetting removed from the bottom of the bumper to where the corner lights are and mesh wire will be put there, this will also most likely happen to the back side marker lights as well. Also the gray pieces that go a the bottom around the car are going to match the red that wil be part of the two tone. | |
|
| | |
crlombardi69
Enthusiast
Name : Chris L
Age : 55
Location : Metro/Detroit area
Joined : 2009-12-31
Post Count : 207
Merit : 5
| | Subject: Re: Project Number 2: Paint and Body Wed Mar 09, 2011 7:44 pm | |
| Nice job! I see so many hours of labor there to do that paint job properly. You are very ambitious. | |
|
| | |
nebstewart07
Fanatic
Name : Ben Stewart
Age : 34
Location : Schofiel Barracks, HI
Joined : 2010-12-12
Post Count : 390
Merit : 6
| | Subject: Re: Project Number 2: Paint and Body Thu Mar 10, 2011 2:26 pm | |
| - crlombardi69 wrote:
- Nice job! I see so many hours of labor there to do that paint job properly. You are very ambitious.
Well i am doing some of the work but then the rest is being done by the body guy. But you should look at my other thread project number 1 interior. | |
|
| | |
nebstewart07
Fanatic
Name : Ben Stewart
Age : 34
Location : Schofiel Barracks, HI
Joined : 2010-12-12
Post Count : 390
Merit : 6
| | Subject: Re: Project Number 2: Paint and Body Thu Mar 10, 2011 2:40 pm | |
| Alright guys antenna got shaved and the trunk. Then laid some more primer and then a guide coat whick will be wet sanded again to ensure all dents have beeen removed. Shaved trunk 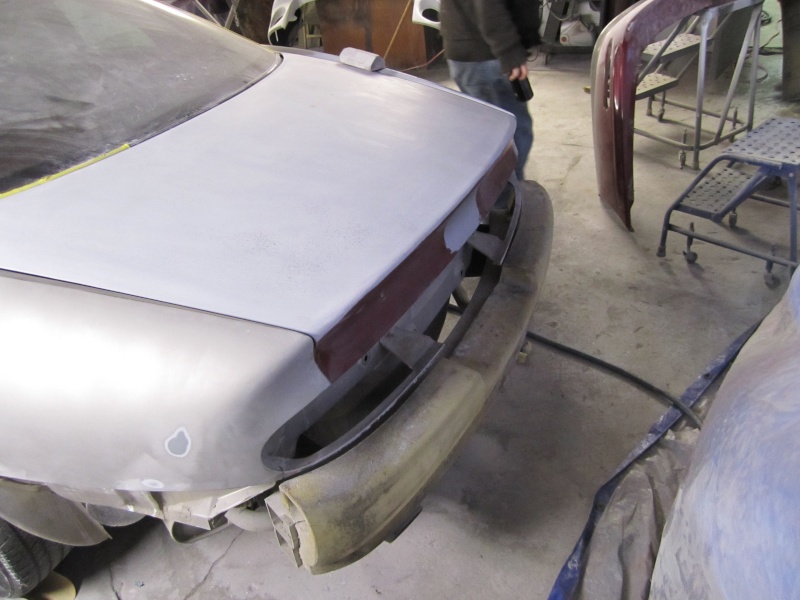 Shaved antenna:  Front end removed:  Front end again:  Fenders: 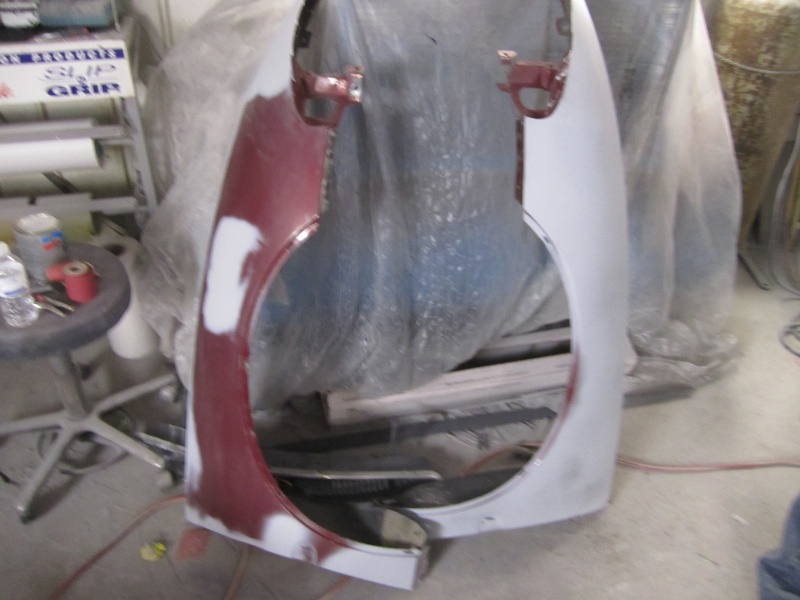 We are getting ready to jame everything hopefully Friday. | |
|
| | |
BMD
Aficionado

Name : BMD
Location : Canada
Joined : 2009-04-28
Post Count : 1161
Merit : 36
| | Subject: Re: Project Number 2: Paint and Body Thu Mar 10, 2011 4:49 pm | |
| Hey Ben, great work. Do you work at a body-shop, or do you know someone who owns one and their lettin' you work on your own car? Also, how come you kept the driver side door off during this process? | |
|
| | |
Eldo
Expert
Name : Mark
Age : 59
Location : West Salem, Oregon... FINALLY
Joined : 2009-04-09
Post Count : 3140
Merit : 104
| | Subject: Re: Project Number 2: Paint and Body Thu Mar 10, 2011 5:37 pm | |
| So what are you going to do for an antenna? | |
|
| | |
nebstewart07
Fanatic
Name : Ben Stewart
Age : 34
Location : Schofiel Barracks, HI
Joined : 2010-12-12
Post Count : 390
Merit : 6
| | Subject: Re: Project Number 2: Paint and Body Fri Mar 11, 2011 5:07 pm | |
| - BMD wrote:
- Hey Ben, great work. Do you work at a body-shop, or do you know someone who owns one and their lettin' you work on your own car? Also, how come you kept the driver side door off during this process?
I have an old buddy that owns his own shop, he is charging me to do it but is giving me a discount since i have been helping. Pretty damn cheap. I believe something like this would run about 7 or 8 grand and i am not even close to that. Drivers door was off because we found a different door to be put on and took the beige one off and didnt want to put it back on when it would be coming off again. I have more pics that will be uploaded tommorow. From here on is where i stop doing anything, since I am going out of town, he is taking care of the rest. It should be finished when I get back on the 21st, if not I will continue to work on the car. | |
|
| | |
nebstewart07
Fanatic
Name : Ben Stewart
Age : 34
Location : Schofiel Barracks, HI
Joined : 2010-12-12
Post Count : 390
Merit : 6
| | Subject: Re: Project Number 2: Paint and Body Fri Mar 11, 2011 5:08 pm | |
| - Eldo wrote:
- So what are you going to do for an antenna?
I am going to find an interior antenna and use it. | |
|
| | |
albertj
Master

Name :
Location : Finger Lakes of New York State
Joined : 2007-05-31
Post Count : 8593
Merit : 180
| | Subject: Re: Project Number 2: Paint and Body Fri Mar 11, 2011 9:18 pm | |
| - nebstewart07 wrote:
- Eldo wrote:
- So what are you going to do for an antenna?
I am going to find an interior antenna and use it. Did you consider an amplified Shark Fin? | |
|
| | |
robotennis61
Guru

Name : robotennis
Age : 62
Location : las vegas
Joined : 2007-12-17
Post Count : 5562
Merit : 143
| | Subject: Re: Project Number 2: Paint and Body Fri Mar 11, 2011 9:46 pm | |
| consider this  Universal Window-mount Antenna AM/FM replacement antenna 10 people say: Item #12044UA200 IN STOCK $19.99 crutchfield | |
|
| | |
BlownRiv
Member
Name : Name
Joined : 2009-10-10
Post Count : 66
Merit : 4
| | Subject: Re: Project Number 2: Paint and Body Sat Mar 12, 2011 11:00 am | |
| You can mount the antenna to go on the inside of the fender. You can do this with the stock setup. In some cases you will even get better reception. | |
|
| | |
robotennis61
Guru
Name : robotennis
Age : 62
Location : las vegas
Joined : 2007-12-17
Post Count : 5562
Merit : 143
| | Subject: Re: Project Number 2: Paint and Body Sat Mar 12, 2011 3:40 pm | |
| - BlownRiv wrote:
- You can mount the antenna to go on the inside of the fender. You can do this with the stock setup. In some cases you will even get better reception.
how do you do that? | |
|
| | |
albertj
Master
Name :
Location : Finger Lakes of New York State
Joined : 2007-05-31
Post Count : 8593
Merit : 180
| | Subject: Re: Project Number 2: Paint and Body Sat Mar 12, 2011 3:53 pm | |
| - BlownRiv wrote:
- You can mount the antenna to go on the inside of the fender. You can do this with the stock setup. In some cases you will even get better reception.
...if the fenders are not steel or aluminum, yeah. (in many cars they are plastic). If they *are* steel or aluminum it can work if you can get the ant near to the wheel opening somehow (FM waves travel line-of-sight). Many mitsu's use the trunk lid, it works OK except when it rains. The way they do it is by insulating hardware at the trunk hinges (nylon washers that have 'shoulders'that fit in the bolt holes). I used to have an RFID tag under the front bumper skin. If you open the hood and look at the bumper you will see that something like you r antenna may be mountable (using 3M heavy duty fasterers, the self stick hard plastic ones with pips that look like broccoli buds) just to the left or right of the grille opening. That RFID -- it quit working after a while, I don't know if they changed the reader strategy or if the battery got weak. I had to move it to front license plate frame, which I don't like because people tend to whack it when parking. I do know that the reader strategy (this is RFID for tolls) changed but I don't really know how it works. I imagine it works by triggering the camera with the RFID as you approach then logging your passing. As a background task the computer can then do the lookup and charge the toll (no hurry for that). I think for this AM-FM antenna reasonable reception in urban areas should be do-able by mounting it in such a location (under the package shelf) if it will fit. Try to fit it in one of the humps behind a headrest do you don't lose trunk space and you can get it *above* the metal reinforcement that sits under the package shelf. If not, the long area under the front yellow side markers or under the rear red side markers might actually be a decent bet. A very good alternative to any of those would be next to the BCM under the rear package shelf. (The BCM has a radio receiver, remember?) The rear window glass should not be much of a problem for the AM-FM bands. If there is an issue it would be on rural highways where, with a regular auto antenna you can listen (when the "skip" is decent, with some static) to most of the AM "clear channel" stations all over the country at night, like WBZ Boston, KYW Philadelphia, WOWO Fort Wayne IN. **Actually** thinking about it the least cost solution would probably involve a piece of wire, some odd hardware, and maybe some duct tape. Those of you who are radio amateurs please chime in. What I am thinking is use the current shielded cable from the radio but reroute to the rear package shelf. Get a plug that the wire will mate into (scavenge one off a broken power antenna) and connect the shield (outer) side to ground and just run a plain wire to the center conductor. My guess is a plain wire between 31 and 54 inches long, stretched out as long/straight as it can be, should recieve relatively strong signals. Tape the wire under the rear package shelf (but *over* the metal. You will have to take out the rear seat to install this right) What do you all think? | |
|
| | |
nebstewart07
Fanatic
Name : Ben Stewart
Age : 34
Location : Schofiel Barracks, HI
Joined : 2010-12-12
Post Count : 390
Merit : 6
| | Subject: Re: Project Number 2: Paint and Body Mon Mar 14, 2011 10:33 am | |
| Alright guys here is an update. Some of the car has been painted like the jams etc but i do not have the pics yet since they are on my phone since i have not been there and they were sent to me by my body guy. So here are the last pics that i have that i actually took when I was their. Wet sanded to ensure dents are removed:  Front bumper:  Wet sanded rear end:  Front end with everything removed:  Drivers side fender wet sanded:  Passenger door:  Drivers doror had a little rust on the bottom where the trim is but we got it fixed:  Passenger door again:  Passenger quarter:  And for the quarter window chrome that is above the window we had to get a window guy to remove it with the window $60 each window that is in and out. Once i get the paint pictures for the jams I will upload them here. | |
|
| | |
robotennis61
Guru
Name : robotennis
Age : 62
Location : las vegas
Joined : 2007-12-17
Post Count : 5562
Merit : 143
| | Subject: Re: Project Number 2: Paint and Body Mon Mar 14, 2011 10:35 am | |
| Nice.How difficult is it to unlpug all the electricals at the door from the body? | |
|
| | |
nebstewart07
Fanatic
Name : Ben Stewart
Age : 34
Location : Schofiel Barracks, HI
Joined : 2010-12-12
Post Count : 390
Merit : 6
| | Subject: Re: Project Number 2: Paint and Body Mon Mar 14, 2011 10:53 am | |
| Not very hard at all take apart door panel unplug wiring pull it through the door. Pretty easy its about 4 or 5 connections once you unplug the ones for the door panel. | |
|
| | |
nebstewart07
Fanatic
Name : Ben Stewart
Age : 34
Location : Schofiel Barracks, HI
Joined : 2010-12-12
Post Count : 390
Merit : 6
| | Subject: Paint Pictures! Mon Mar 14, 2011 10:58 am | |
| Alright guys here is some door jam paint pictures. These were sent to me by my body guy tooken by his phone so sorry for the quality but something is better than nothing. Door jam painted:  Door jam:  Trunk jam it is actually supposed to be black since the top of the two tone is black so it is getting fixed no biggie. 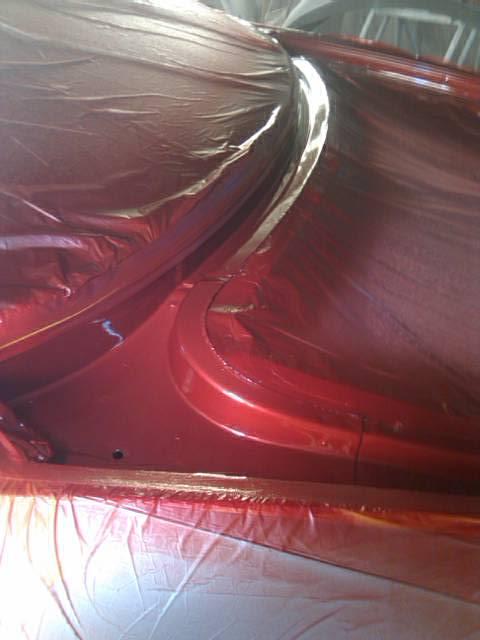 I love the color it was supposed to be candy red mettalic pearl but got changed up a little bit when too much dark red tint was added owell .I love it how it looks in the pics I cant say yet what it looks like yet in person since I am in colorado: Here is a pic of a mountain in colorado  | |
|
| | |
99Rivman
Aficionado

Name : Randall
Location : North Carolina
Joined : 2007-01-16
Post Count : 2009
Merit : 89
| | Subject: Re: Project Number 2: Paint and Body Tue Mar 15, 2011 2:59 pm | |
| Looks good! It is coming along very well  - nebstewart07 wrote:
- And for the quarter window chrome that is above the window we had to get a window guy to remove it with the window $60 each window that is in and out. Once i get the paint pictures for the jams I will upload them here.
Well worth the investment having a Pro do it! If I remember correctly I paid $75 each just to have them put back in!!!  | |
|
| | |
nebstewart07
Fanatic
Name : Ben Stewart
Age : 34
Location : Schofiel Barracks, HI
Joined : 2010-12-12
Post Count : 390
Merit : 6
| | Subject: Re: Project Number 2: Paint and Body Tue Mar 22, 2011 1:37 pm | |
| Just got back from colorado and uploaded pics from phone here they are Door inner  Other door inner:  Door handles:  Trim:  Trim along bottom of car: 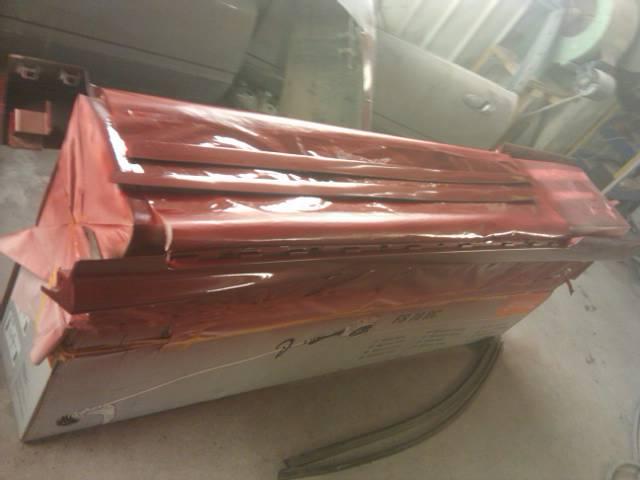 Other trim on bottom of car: 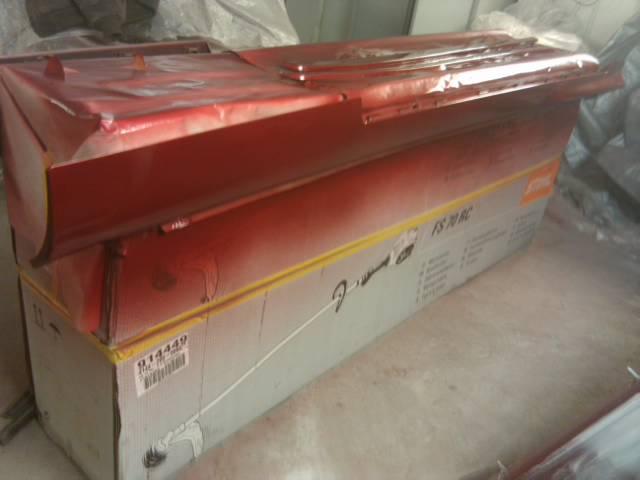 Mirror:  O have more pics just want to keep everyone in suspense lol.They will be uploaded later today! haha | |
|
| | |
bigdave
Fanatic
Name : Dave
Age : 60
Location : Cheektowaga , NY (Buffalo)
Joined : 2010-10-17
Post Count : 399
Merit : 22
| | Subject: Re: Project Number 2: Paint and Body Tue Mar 22, 2011 7:36 pm | |
| Love the color combo. Looks GREAT! | |
|
| | |
BMD
Aficionado
Name : BMD
Location : Canada
Joined : 2009-04-28
Post Count : 1161
Merit : 36
| | Subject: Re: Project Number 2: Paint and Body Tue Mar 22, 2011 9:07 pm | |
| Ditto on the color combo, it looks like it will be very interesting and different. By the way who is doing the painting, you or your friend? | |
|
| | |
wee-one
Member

Name : Randy
Age : 36
Location : Nebraska
Joined : 2011-03-15
Post Count : 95
Merit : 3
| | Subject: Re: Project Number 2: Paint and Body Tue Mar 22, 2011 9:38 pm | |
| It'll look awesome man... at least your doing it right and not just rolling it in the paint boothe.. taping the windows and tires... And spray it down like so many other people get. . I've had a car where you opened the door and you could see the blue kindof fade to white like it was airbrushed.... neddless to say I only had that car for a month... But props on doing it right and not Fing up another Riviera... the red will really pop. What I don't understand.... why are you buying another dash? Don't you have a silver dash kit on there now? And the red interior will look nice with the paint... looks in nicer condition than mine... my red is turning Brown in the steering wheel  | |
|
| | |
Sponsored content
| | Subject: Re: Project Number 2: Paint and Body | |
| |
|
| | |
| | Project Number 2: Paint and Body | |
|


