Name : Codith Age : 37 Location : Villa Park, IL Joined : 2007-02-08Post Count : 3671 Merit : 140
Subject: Write-Up: S/C Port & Polish Sun Sep 20, 2009 2:53 am
I've decided to give the porting & polishing a whirl on my genV. So far, it's going pretty well. With the right tools and some great patience, you can do an expensive procedure yourself with same or better results than the vendor products, depending on how much you want to put into it. I am going for all out. I plan to have every surface on the inside of the blower smooth as glass (which is a little more work than the vendors normally do to my knowledge. If you have someone do it on the side, the workmanship varies greatly. If you are going that route, have a good idea of what you want and what he or she will do before you give them your blower.
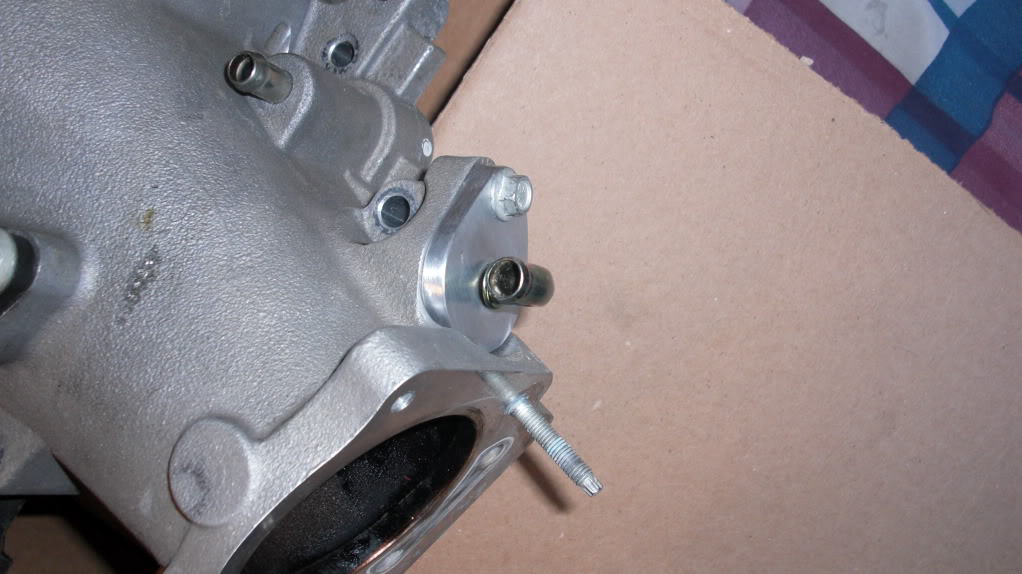
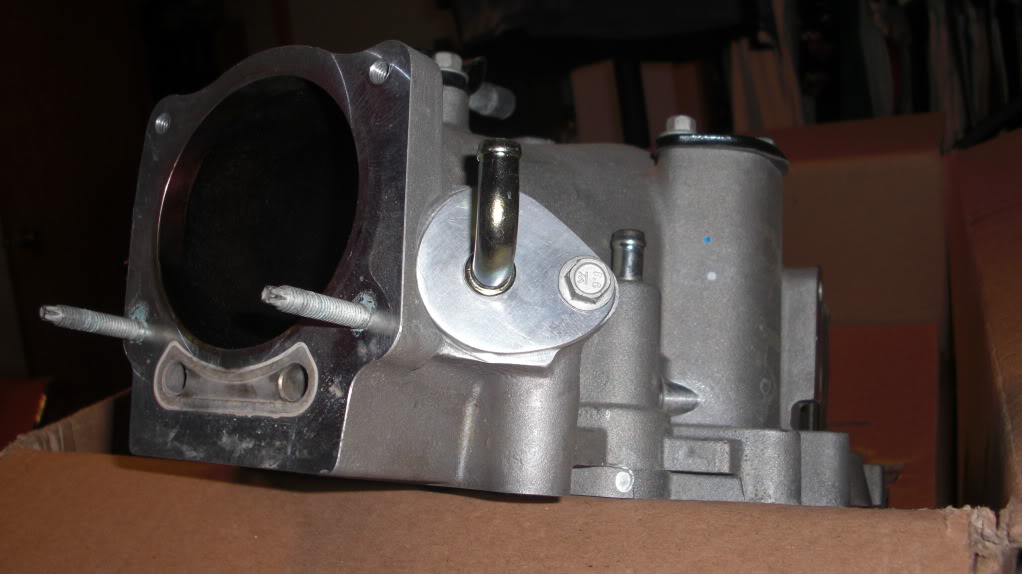
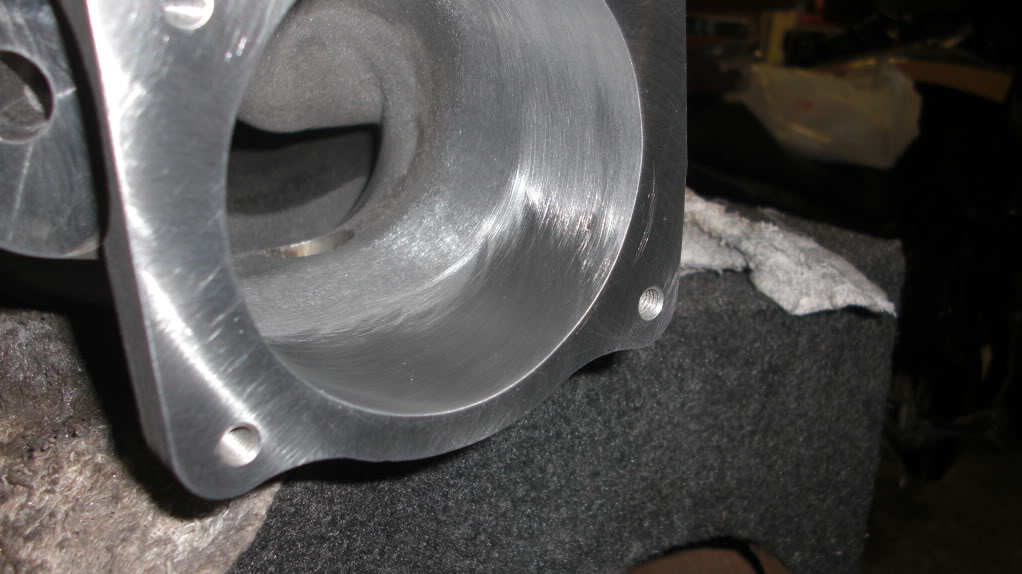
The two above pictures are of the inlet of my genV before I started. I really didn't take any good pictures of how the inner surface looks but basically it's about as rough as most of the outside. This passes but if you want the most out of it, smooth is better. So that is the object - very simple. We just want to smooth the surfaces. If done right, there should not be any sizable change in the shape or design of anything. Other than that, there's a few other things that can be done such as opening the inlet up to a larger size to fit an oversized throttle body. The outlet of the blower is kind of a totally different job than the front. For the moment, I'm just going to focus on the inlet.
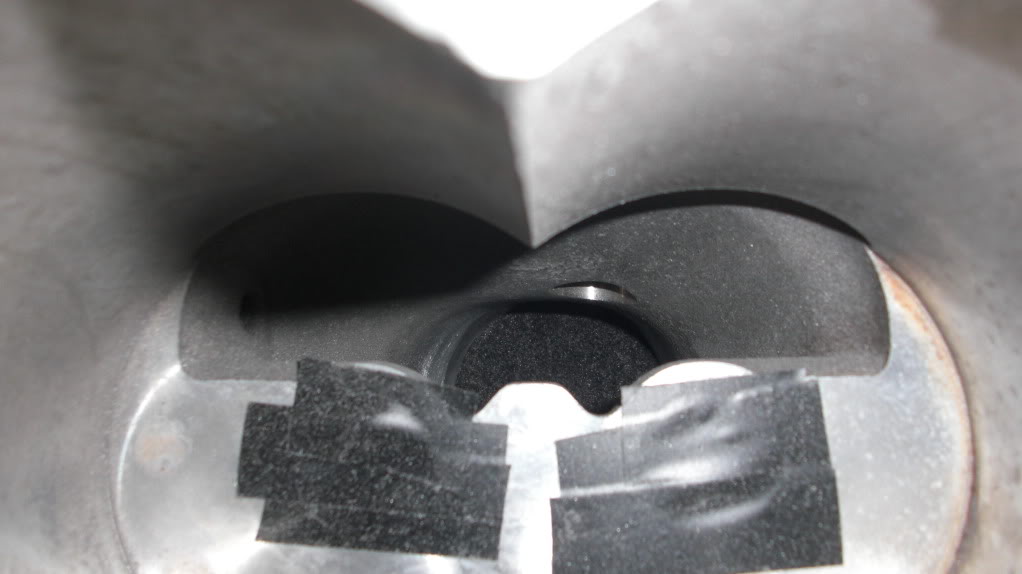
Like pictured above, the first thing you want to do before touching anything else is cover up the two rotor bearing cavities. I used electrical tape. When you start, you'll have dust everywhere in there before you know it. On that same note, be sure to use a respirator and safety glasses. Aluminum fumes are rather bad for you to breathe in.
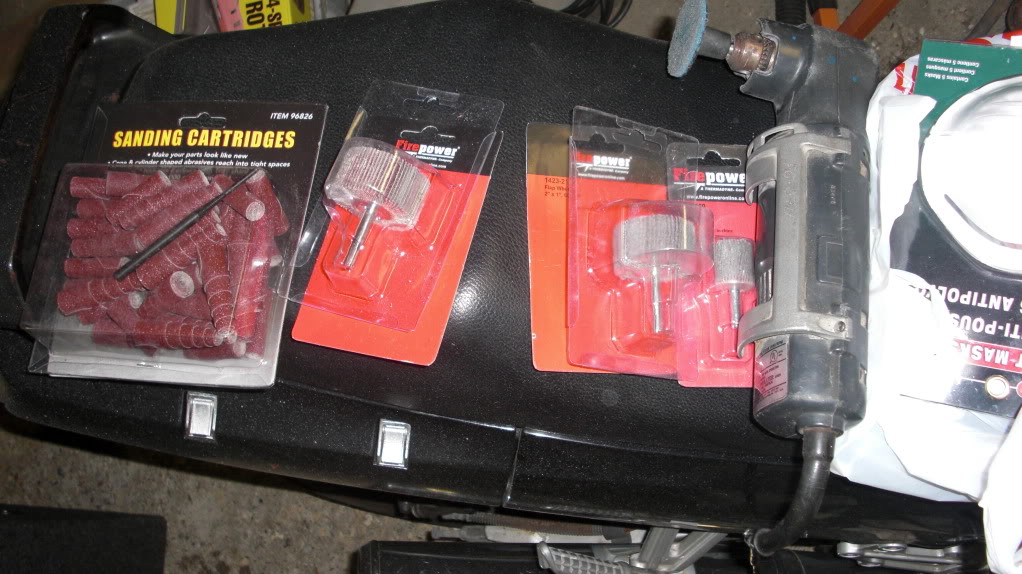
Since this is my first time ever really doing this, I just bought a bunch of different types of abrasives to carefully try. I intended to use a dremel but so far, I've been using a drill. As seen in the above picture, I've been very happy with the results using the sanding tools in the red packages. I tried using the sanding bits at the left and wasn't nearly as happy with them. I'm going to continue using the ones pictured in the middle. Those ones happen to be 60 and 80 grit. That's what I started with.
What's not pictured are the grinding stones I used to remove most of the lip on the inlet of the blower. Refer to stock blower pics to see that. Getting rid of that just makes sense to me. It opens the inlet up about 2mm or so but more importantly, it gives the rest of the p&p process on the inlet somewhere to start. I suppose you could leave the lip but it isn't going to make anything any easier for you. I used a pretty fine grinding stone to take that down. If you used any sandpaper bit, you would be there quite a while. Just be very carefull with grinding stones because they like to jump sometimes and you can quickly grind surfaces you don't want to, depending on the shape and angle of the bit. Also, grinding stones can sometimes shoot some pretty uncomfortable debis out so wearing gloves while using those is not a bad idea.
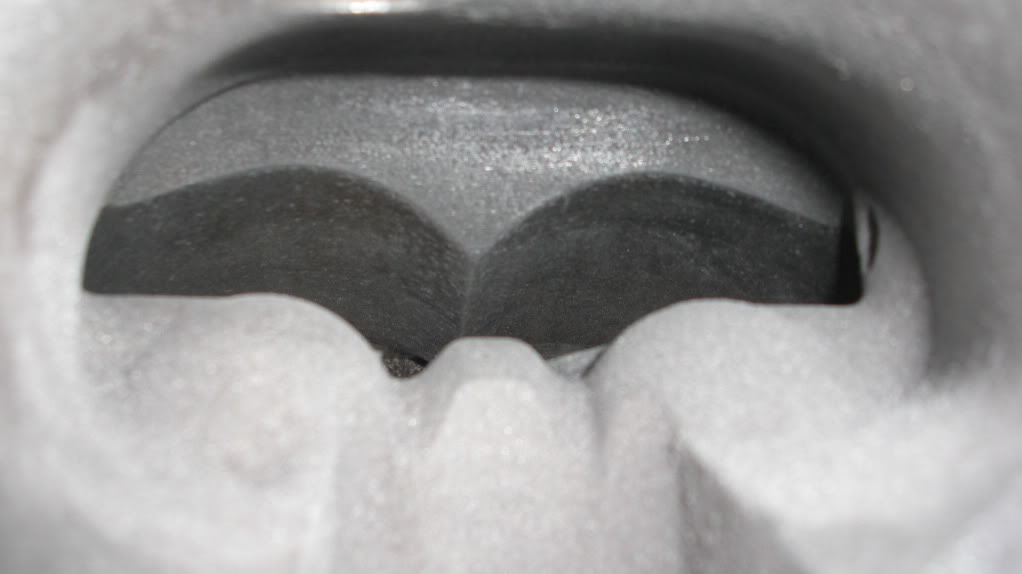
the deep part of the genV inlet
Here's some of the pics of the blower after some work.
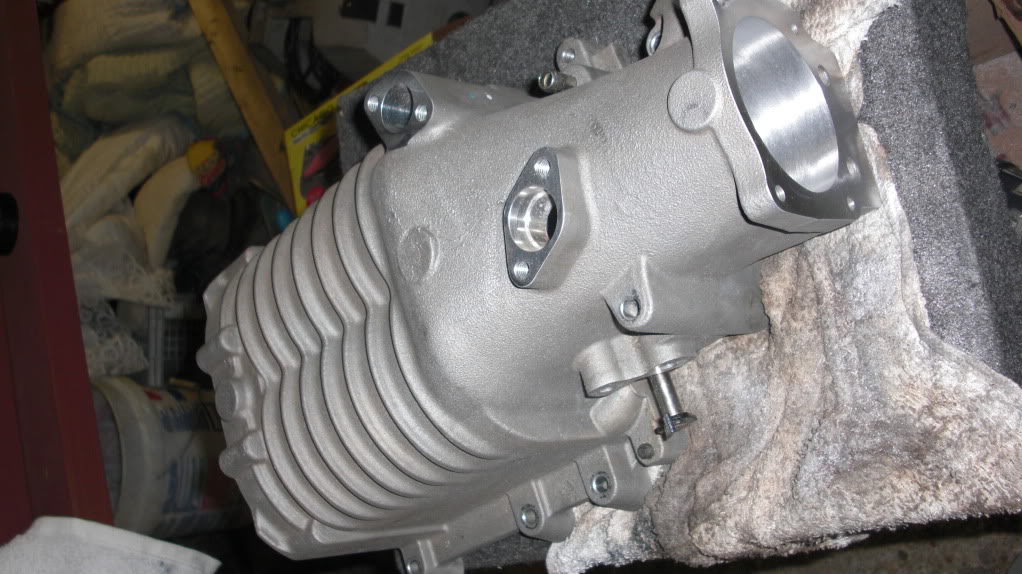
The above 3 pics are after the 60 grit sanding bits IIRC
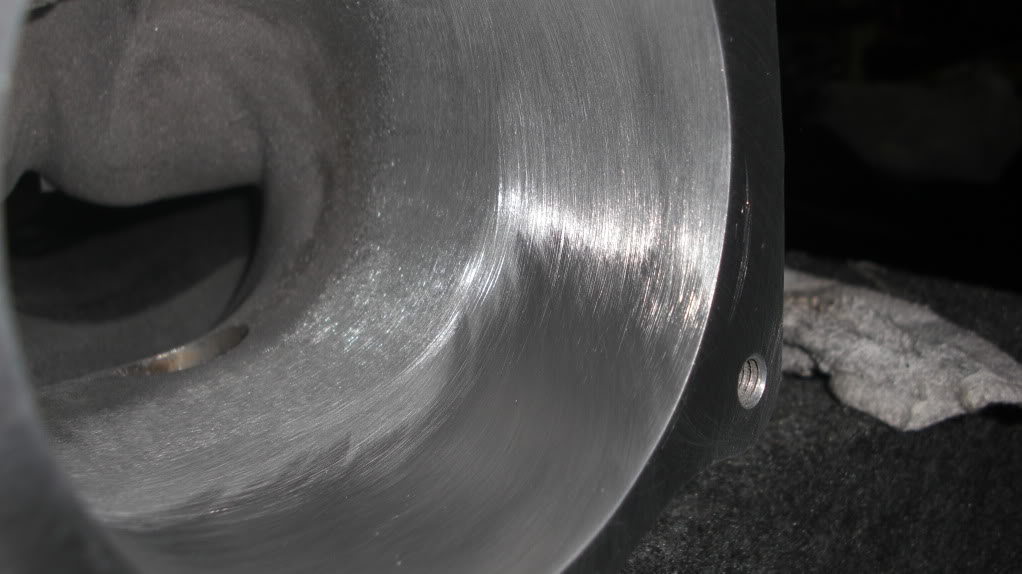
The smooth part in the above 4 pictures is pretty much me testing the poilshing pads after the sanding. I got a small kit that has a course and fine finishing discs. It didn't take too much effort to make the surface smooth as glass to the touch from that point.
For some early thoughts, I would say that if you have some time and will, this is probably worth doing. The surface is a lot better the second you touch it with sandpaper. Again, you don't have to go crazy and turn it into a mirror on the inside to get a gain. I will update as I progress and learn. I'd love to hear thoughts and suggestions and I'll answer any questions I can.
T Riley Guru
Name : Travis Age : 34 Location : Minnesconsin Joined : 2007-02-08Post Count : 5127 Merit : 10
Subject: Re: Write-Up: S/C Port & Polish Sun Sep 20, 2009 4:40 am
Nice
turtleman Expert
Name : Codith Age : 37 Location : Villa Park, IL Joined : 2007-02-08Post Count : 3671 Merit : 140
Subject: Re: Write-Up: S/C Port & Polish Sun Sep 20, 2009 3:37 pm
click the "HQ" button because the original video is already pretty lacking of detail. I'm waiting for some more sanding bits to come in now to do the far insides of the blower. This is about 3 hours of work.
Rickw Guru
Name : Rick Location : Lancaster, MA Joined : 2008-09-13Post Count : 6282 Merit : 119
Subject: Re: Write-Up: S/C Port & Polish Sun Sep 20, 2009 4:06 pm
What is it you want to mill on the outlet side.? And who would you trust to do it. ? I'm getting inspired by your porting and polishing of the intake side and will start doing that soon myself since it's mainly labor and just a little in materials.
Since your not going to use that EVAP blank with brazed tube, would you be willing to part with it and make a blank for your Gen V. I plan on keeping my stock EVAP and EGR set up, so if you could pass that EVAP adapter on (i'll pay you for it, naturally) it would be much appreciated.
Also, have you opened the inlet up by removing the lip to 97mm which is the optional size of the N* TB from the ZZP Kit. (options are 95mm or 97mm) Thanks, Rick
turtleman Expert
Name : Codith Age : 37 Location : Villa Park, IL Joined : 2007-02-08Post Count : 3671 Merit : 140
Subject: Re: Write-Up: S/C Port & Polish Sun Sep 20, 2009 11:44 pm
Rickw wrote:
What is it you want to mill on the outlet side.? And who would you trust to do it. ? I'm getting inspired by your porting and polishing of the intake side and will start doing that soon myself since it's mainly labor and just a little in materials.
Since your not going to use that EVAP blank with brazed tube, would you be willing to part with it and make a blank for your Gen V. I plan on keeping my stock EVAP and EGR set up, so if you could pass that EVAP adapter on (i'll pay you for it, naturally) it would be much appreciated.
Also, have you opened the inlet up by removing the lip to 97mm which is the optional size of the N* TB from the ZZP Kit. (options are 95mm or 97mm) Thanks, Rick
My outlet needs to be cut for an IC. I will certainly be getting a full size in the nearish future. I can't make it look the way I want with hand tools. I'm very picky.
I bought the EVAP plate from Tommy Glover with intent to use it so I won't be selling it but I can ask him if he knows of any others floating around anywhere. One guy was making a bunch of them for a while. I have a need to keep my options open for replacing the evap system in the future if I ever need to.
The optional size for the northstar is 77mm from zzp. You can also go for the zzp custom 78mm one. Opening the inlet of the genV to 77mm or 78mm is no problem at all really. Tuesday, I'm gonna check it with a inside micrometer to see exactly where its at now but ~77.5mm is my guess with the lip removed and fully blended.
Ultimately, I'm probably going to get the 77mm northstar from zzp with an adaptor made without the side port but that's in the far back of my concerns right now. I need to complete the blower and get another LIM first.
Rickw Guru
Name : Rick Location : Lancaster, MA Joined : 2008-09-13Post Count : 6282 Merit : 119
Subject: Re: Write-Up: S/C Port & Polish Mon Sep 21, 2009 7:50 am
Thanks. I meant to say 75 and 77mm. If you could find one of those modified EVAP plates it would be greatly appreciated. Rick
turtleman Expert
Name : Codith Age : 37 Location : Villa Park, IL Joined : 2007-02-08Post Count : 3671 Merit : 140
Subject: Re: Write-Up: S/C Port & Polish Thu Nov 12, 2009 8:53 pm
ways to tell if you're about done polishing an area - see if you can read words of an object from the reflection
T Riley Guru
Name : Travis Age : 34 Location : Minnesconsin Joined : 2007-02-08Post Count : 5127 Merit : 10
Subject: Re: Write-Up: S/C Port & Polish Thu Nov 12, 2009 9:33 pm
your crazy.
turtleman Expert
Name : Codith Age : 37 Location : Villa Park, IL Joined : 2007-02-08Post Count : 3671 Merit : 140
Subject: Re: Write-Up: S/C Port & Polish Thu Mar 25, 2010 5:17 pm
This is going pretty slow now. I can't do much with power tools at this point except little pieces and gotta be pretty careful. I'm pretty much going out for about 15min every so often to hand sand some until my hand aches. It sucks. I think I'm going to pretty much hold off on further progress until I get the outlet done. This blower is a good bit harder to p&p inside than a gen III.
turtleman Expert
Name : Codith Age : 37 Location : Villa Park, IL Joined : 2007-02-08Post Count : 3671 Merit : 140
Subject: Re: Write-Up: S/C Port & Polish Thu Mar 25, 2010 7:42 pm
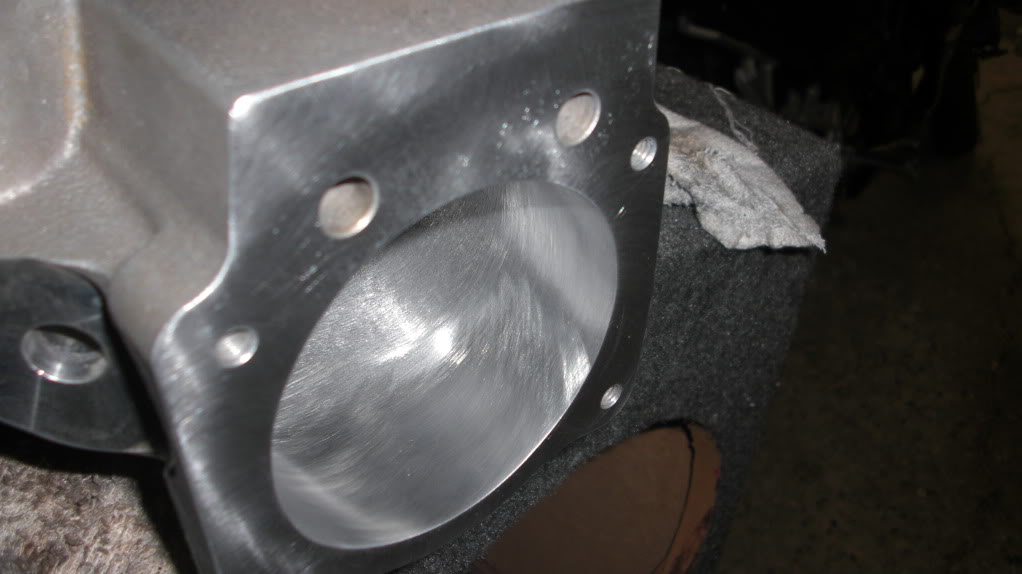
I finally have a good shot where you can actually see texture pretty well. At the right of the picture where it looks rough is pretty much how it starts out all over. Even that area has had the beginnings of some hand sanding so you can pretty much see how different it is now and how slow it can go.
I also discovered that my left hand is very slightly smaller than my right so it fits a little farther in the snout without getting stuck. Always learning about yourself in life..
Tank Enthusiast
Name : Shawn Age : 40 Location : Mansfield, Ohio Joined : 2010-01-31Post Count : 123 Merit : 1
Subject: Re: Write-Up: S/C Port & Polish Fri Mar 26, 2010 10:36 am
Man looks really good! I wish I felt comfy enough to do this stuff to my car.
flyineagle96 Junkie
Name : James E Age : 55 Location : Dalton,Mass Joined : 2009-12-21Post Count : 915 Merit : 23
Subject: Re: Write-Up: S/C Port & Polish Fri Mar 26, 2010 5:15 pm
looks nice with it that smooth what r the gains and how much better is the flow i mite do my throbody
flyineagle96 Junkie
Name : James E Age : 55 Location : Dalton,Mass Joined : 2009-12-21Post Count : 915 Merit : 23
well i ported and polished my throttle body it made noticeable gains first time that i ever did that to a car big difference i filed and sanded about 1.2 ' off it nice. doin your sc must make big difference my son is goin to do his sc like yours. thanks for the pics and info
Rickw Guru
Name : Rick Location : Lancaster, MA Joined : 2008-09-13Post Count : 6282 Merit : 119
well i ported and polished my throttle body it made noticeable gains first time that i ever did that to a car big difference i filed and sanded about 1.2 ' off it nice. doin your sc must make big difference my son is goin to do his sc like yours. thanks for the pics and info
Can hardly understand what you just said. Try some punctuation, if not for us, then your son. How can you FILE and SAND 1.2' (that is one point two feet ?) Even if you mean 1.2 mm, that's a considerable amount of aluminum, depending on where you removed it from. And FILING and SANDING isn't going to give you the finish you need for a proper port and polish job. Leave it to the professionals.
flyineagle96 Junkie
Name : James E Age : 55 Location : Dalton,Mass Joined : 2009-12-21Post Count : 915 Merit : 23
Subject: Re: Write-Up: S/C Port & Polish Fri Apr 02, 2010 8:27 am
first of all i wasn't talking to you, and second i filed 1/16", then sanded with various grit sandpaper and ended with 1500 grit until as smooth as a babies butt. i didn't want to spend a long time typing, I'm not that good at typing, but i am good at making fists...
T Riley Guru
Name : Travis Age : 34 Location : Minnesconsin Joined : 2007-02-08Post Count : 5127 Merit : 10
Subject: Re: Write-Up: S/C Port & Polish Fri Apr 02, 2010 11:03 am
OMG an old man fight...
robotennis61 Guru
Name : robotennis Age : 63 Location : las vegas Joined : 2007-12-17Post Count : 5562 Merit : 143
first of all i wasn't talking to you, and second i filed 1/16", then sanded with various grit sandpaper and ended with 1500 grit until as smooth as a babies butt. i didn't want to spend a long time typing, I'm not that good at typing, but i am good at making fists...
Cut the BS tough guy crap and stick to the topic please.
turtleman Expert
Name : Codith Age : 37 Location : Villa Park, IL Joined : 2007-02-08Post Count : 3671 Merit : 140
looks nice with it that smooth what r the gains and how much better is the flow i mite do my throbody
I'm not sure. Everyone agrees inlet smoothing is worthwhile to do on gen3 blowers and gen5's have just as rough a casting but I guess people don't want to give that money to the vendors just to smooth half the inlet on a gen5 and not do anything to the outlet? I'm kinda doing the tedious part myself so I can just get the outlet machined, snout turned down and it's ready to go. I may need another source for the machining though or live with a nice hand job. [no pun intended]
Side question for anyone that have or have seen up close an inlet smoothing job from one of the vendors, do they do all the way back to the dip at the top of the inlet cave right before it gets to the rotors? I've looked at some of the pictures and it looks like they stop a little behind the bypass cavity. If that's the case, there's a lot they're not getting. The gen3 I have that was done by kemp was done all the way.
T Riley Guru
Name : Travis Age : 34 Location : Minnesconsin Joined : 2007-02-08Post Count : 5127 Merit : 10
first of all i wasn't talking to you, and second i filed 1/16", then sanded with various grit sandpaper and ended with 1500 grit until as smooth as a babies butt. i didn't want to spend a long time typing, I'm not that good at typing, but i am good at making fists...
Cut the BS tough guy crap and stick to the topic please.
LOL this thread delivers!!!! bahahhahahaha
T Riley Guru
Name : Travis Age : 34 Location : Minnesconsin Joined : 2007-02-08Post Count : 5127 Merit : 10
looks nice with it that smooth what r the gains and how much better is the flow i mite do my throbody
I'm not sure. Everyone agrees inlet smoothing is worthwhile to do on gen3 blowers and gen5's have just as rough a casting but I guess people don't want to give that money to the vendors just to smooth half the inlet on a gen5 and not do anything to the outlet? I'm kinda doing the tedious part myself so I can just get the outlet machined, snout turned down and it's ready to go. I may need another source for the machining though or live with a nice hand job. [no pun intended]
Side question for anyone that have or have seen up close an inlet smoothing job from one of the vendors, do they do all the way back to the dip at the top of the inlet cave right before it gets to the rotors? I've looked at some of the pictures and it looks like they stop a little behind the bypass cavity. If that's the case, there's a lot they're not getting. The gen3 I have that was done by kemp was done all the way.
ZZP's is just to the bypass cavity.. they use one big flapper wheel thingy.. kemp whips out the dremel and finishes it off. well he used too.. he doesn't port them anymore i don't think..
flyineagle96 Junkie
Name : James E Age : 55 Location : Dalton,Mass Joined : 2009-12-21Post Count : 915 Merit : 23
I just got a S/C with 60,000 mi on it for $78....gonna take that biatch apart and do exactly what this thread is about .
The reason I got it so cheap......some tech at the dealer my buddy currently works at mis-diagnosed a "knocking" sound as the S/C coupler being bad. As the customer had GMPP warranty, they authorized S/C replacement (they don't rebuild). Turns out one of the idler pulleys was bad (not the coupler), so he "got" the S/C somehow. All I had to do was get a 3.4" pulley for his daughters GP and put it on......he gave me the damn thing
Robo, porting and polishing ANY engine will gain torque and HP. The more air you suck and blow, the faster you go! <--------I'm a poet?! wtf?!
turtleman Expert
Name : Codith Age : 37 Location : Villa Park, IL Joined : 2007-02-08Post Count : 3671 Merit : 140
Subject: Re: Write-Up: S/C Port & Polish Sat Apr 03, 2010 3:47 pm
robotennis61 wrote:
i think i read somewhere that the most you can get from P&P on a S/C car ,is a little more throttle response. is that true?
I'm not sure what you mean by that. Are you saying p&p on the motor (intake runners, heads, extractors) of a supercharged car or p&p on the blower it self? P&P anywhere done correctly is definitely a good thing. I happen to love the fact that generally other than the initial time and cost of p&p, it's a pretty uncompromising mod. In other words, you're not giving anything up for the gain in fuel economy, reliability, torque characteristics, etc. as you are with most big modifications. IMO, if I'm going to be spinning a blower to make double the boost it was intended to, I'll do everything I can to make it work better past its intended efficiency range.
I may yet stand corrected here but I don't think you'd notice any difference in throttle responce from any p&p unless you're correcting a serious design or manufacturing setback in the porting to start with (ie. some known weak spot like for instance a really shitty exhaust runner finish that causes very poor scavanging. (random example - not a problem with our cars) I believe p&p (especially in an M90) is really something to help it get air through it easier when it requires a lot of energy to do so - top end power.