 |
The 8th Gen Riviera Resource
|
| | | Write-Up: Make a Brake Bleeder |  |
|
+5robotennis61 TType_Riviera AA 96RIVMANN albertj 9 posters | |
| Author | Message |
|---|
albertj
Master

Name :
Location : Finger Lakes of New York State
Joined : 2007-05-31
Post Count : 8599
Merit : 180
| | Subject: Write-Up: Make a Brake Bleeder Sat Feb 23, 2008 11:56 pm | |
| In another thread Aaron wrote he wanted to learn about my 'homemade' power brake bleeder. This is a text-only write-up pending my getting the time to take pictures of the thing to post. When I post pictures I will correct mistakes in this write up and be more specific so you are not wondering which parts are which.
Basically - you need some odd parts:
- about 10' of vinyl hose same diameter as the hose that goes to the sprayer's wand
- an air pressure gauge that reads 0-30 PSI (higher is OK but you're only going to ~15 PSI so point is you need to be able to tell when you've puffed it up that much)
- a spare master cylinder reservoir cap (dealer or AutoZone or Pep Boys or Advantage or CarQuest, you may have to order it though)
- a Tee fitting
- a brass end fitting for an air hose
- a brass union for that sprayer hose
- a garden chemical sprayer, one gallon only. An inexpensive one will work.
Basically, you clean out the sprayer and the vinyl hose by running some dry gas (alcohol) thru them, wipe the sprayer dry with a clean lint-free towel, close it back up. Cut the wand hose to leave enough hose to attach the union, then attach that 10' of vinyl hose to the union. Attach the other end to the tee; put the gauge on the second opening in the tee. Drill a hole in the center of the new master cylinder cap to accept the end fitting (on the bottom) thru to the tee with the gauge and hose on it. The nipple on the end of the fitting is *important* I will explain later.
Remove the MC cap (on the MC on the car) and top off the brake fluid. Then with the sprayer bottle up in the engine compartment resting somewhere harmless (like by the air box), attach the new MC cap (the one that has the gauge on it) to the MC. Then open the cap on the sprayer, pour in some brake fluid. A quart should do for a flush and fill. Screw sprayer back together TIGHTLY. Pump to 15 psi or so--on my sprayer that's about 60 strokes. Now you can go from wheel to wheel, open and close the wheel cylinder bleeders until fluid runs clear. Pump more pressure in the sprayer as needed, for me that meant some strokes after each wheel cylinder was flushed and bled. DO NOT PUMP BRISKLY or you will aerate the brake fluid, a serious problem. And yes, after each wheel cylinder is bled, check the level of fluid in the sprayer and add fluid if needed. If you do accidentally run dry, it's no disaster due to the design. The air will bubble into the top of the master cylinder reservoir But don't run it dry - that tends to aerate and dampen (from water vapor int he atmosphere) the fluid.
As you are doing this, be sure to check for bleeding pressure - all you want is around 15 PSI +/- 2PSI. This is why this device has a gauge installed at the top of the master cylinder, and why you want to use one that is relatively low pressure so it's easier to read from a distance. Again, be sure when you pump, not to vigorously or you will aerate the fluid. You could avoid fluid aeration if you could put fluid in a sac inside the sprayer, or put a bladder around the air pump, but frankly I'm not sure how do either without introducing dirt.
When you are done flushing the brake lines and bleeding the brakes, put sprayer on the ground, unscrew the top of the garden sprayer and let the excess air pressure out. The hose assembly will siphon extra fluid out of the MC.
So overall that's it. If I were you, I would consider trying this *only after* I post pictures and a detailed write-up. Point is it's pretty simple. I posted this draft of the write up to get your feedback as to which pictures would be helpful and what part of the text is unclear - email or post.
Albertj | |
| | | | 96RIVMANN
Fanatic

Name : Paul
Location : MN
Joined : 2007-10-22
Post Count : 253
Merit : 11
| | Subject: Re: Write-Up: Make a Brake Bleeder Mon Feb 25, 2008 8:04 am | |
| How about a picture of the mc cap with the fitting installed. Did you drill and tap the cover to accept the npt fitting? | |
| | | | AA
Administrator

Name : Aaron
Age : 46
Location : C-bus, Ohio
Joined : 2007-01-13
Post Count : 18448
Merit : 252
| | Subject: Re: Write-Up: Make a Brake Bleeder Mon Feb 25, 2008 9:13 am | |
| Can't wait for the pics, Albert. I need to flush my brake lines soon. I want to build one of these, use it, and give some feedback. _________________ '05 GTO 6.0L • 6-spd • 95k miles • 0-60: 4.8s • 16.9 avg MPG • Nelson Ledges Lap: 1:26'95 Celica GT 2.2L • 5-spd • 165k miles • 0-60: yes'98 SC Riviera • 281k miles • 298 HP/370 TQ • 0-60: 5.79s • ET: 13.97 @ 99.28 • 4087 lb • 20.1 avg MPG • Nelson Ledges Lap: 1:30
3.4" pulley • AL104 plugs • 180º t-stat • FWI w/K&N • 1.9:1 rockers • OR pushrods • LS6 valve springs • SLP headers • ZZP fuel rails
KYB GR2 struts • MaxAir shocks • Addco sway bars • UMI bushings • GM STB • Enkei 18" EV5s w/ Dunlop DZ101s • F-body calipers
EBC bluestuff/Hawk HP plus • SS lines • Brembo slotted discs • DHP tuned • Aeroforce • Hidden Hitch^^^ SOLD ^^^  '70 Ninety-Eight Holiday Coupe 455cid • 116k miles '70 Ninety-Eight Holiday Coupe 455cid • 116k miles^^^ SOLD ^^^ | |
| | | | albertj
Master
Name :
Location : Finger Lakes of New York State
Joined : 2007-05-31
Post Count : 8599
Merit : 180
| | Subject: Re: Write-Up: Make a Brake Bleeder Tue Feb 26, 2008 11:53 am | |
| Am traveling on business rest of week, will probably get pics done this weekend.
In the meantime I will answer what I can now:
The MC cap - well, I used a 1/4 inch drill for the initial hole thru the cap, and a paper punch - right, a common hole punch - to put a hole in the rubber liner in the cap (it pops right out if you pull on it). Be sure that punched hole goes thru the cap dead center. The rubber liner then in effect becomes a gasket for the brass fittings so that the assembly will hold air pressure. That's why you don't make it any bigger, you don't have to - and that's why you use a hole punch for it, so it won't tear.
I then used a chassis reamer to enlarge the hole in the plastic part MC cap to accept the brass fittings. You need not thread the MC cap for 2 reasons. One, when you are assembling it if it is not threaded you can orient the gauge how you want. Two, you do not want the fixture to fail because the cap cracks because you threaded it or some nutty thing. Point is to make the hole just big enough to let the threads thru, and in the dead center of the cap.
After fitting the parts for the modified MC cap together dry, I pulled them apart and smeared a little black form-a-gasket (blue will work too) on the inside of the plastic cap and then put it back together. I used teflon pipe compound (that white toothppaaste looking stuff plumbers use on some threaded connections) to seal things. So there's a tee on top of the cap, the gauge on top of the tee, the line to the canister on the side of the tee and a nipple fitting (threaded one side and a graduated conical cylinder on the other) under the cap. That was so I could get that siphon action to correct the level of the fluid in the MC when I release the pressure.
EDIT - Pictures are now posted.
Thanks very much for the feedback.
Albertj
Last edited by albertj on Wed Aug 12, 2009 10:44 pm; edited 1 time in total | |
| | | | AA
Administrator
Name : Aaron
Age : 46
Location : C-bus, Ohio
Joined : 2007-01-13
Post Count : 18448
Merit : 252
| | Subject: Re: Write-Up: Make a Brake Bleeder Tue Feb 26, 2008 12:13 pm | |
| I find that when taking photos under the car, using the flash often makes it hard to see things. Using a spot lamp for illumination, and holding the camera still will give better results. _________________ '05 GTO 6.0L • 6-spd • 95k miles • 0-60: 4.8s • 16.9 avg MPG • Nelson Ledges Lap: 1:26'95 Celica GT 2.2L • 5-spd • 165k miles • 0-60: yes'98 SC Riviera • 281k miles • 298 HP/370 TQ • 0-60: 5.79s • ET: 13.97 @ 99.28 • 4087 lb • 20.1 avg MPG • Nelson Ledges Lap: 1:30
3.4" pulley • AL104 plugs • 180º t-stat • FWI w/K&N • 1.9:1 rockers • OR pushrods • LS6 valve springs • SLP headers • ZZP fuel rails
KYB GR2 struts • MaxAir shocks • Addco sway bars • UMI bushings • GM STB • Enkei 18" EV5s w/ Dunlop DZ101s • F-body calipers
EBC bluestuff/Hawk HP plus • SS lines • Brembo slotted discs • DHP tuned • Aeroforce • Hidden Hitch^^^ SOLD ^^^ '70 Ninety-Eight Holiday Coupe 455cid • 116k miles^^^ SOLD ^^^ | |
| | | | albertj
Master
Name :
Location : Finger Lakes of New York State
Joined : 2007-05-31
Post Count : 8599
Merit : 180
| | Subject: Re: Write-Up: Make a Brake Bleeder Tue Feb 26, 2008 4:25 pm | |
| Hmmm.... then what I'll do is find some material (most likely construction paper) for a background with enough contrast, then use a small tripod and reasonable light. Fortunately I don't need undercar shots to tell the story of the bleeder. Will keep that in mind (use a spot/hold camera still) though. Trouble light will probably work, I can tell the camera to do color correction for tungsten.
Okay. Thanks.
Albertj[/img] | |
| | | | albertj
Master
Name :
Location : Finger Lakes of New York State
Joined : 2007-05-31
Post Count : 8599
Merit : 180
| | Subject: Re: Write-Up: Make a Brake Bleeder Sat Mar 01, 2008 4:53 pm | |
| I took the pictures this afternoon and I'm working on the write-up now.
Albertj | |
| | | | albertj
Master
Name :
Location : Finger Lakes of New York State
Joined : 2007-05-31
Post Count : 8599
Merit : 180
| | Subject: detailed write-up Sat Mar 01, 2008 5:58 pm | |
| [write up is complete as of 12 August 2009] WARNING - DISCLAIMER - If you decide to follow these instructions and make (let alone use) one of these things it's at your own peril, risk and responsibility. That said, there is a problem with the possibility of aerating the brake fluid when using this. Do not pump it vigorously, and consider using a bladder to separate the air from the brake fluid. I have some ideas as to how it might be done but have not done so yet. Parts list: a 1-gallon sprayer, such as this Gilmour sold at WalMart. This will run $10 to $15. You do not need a fancy one, nor one with a stainless steel wand. a tube or container of pipe compound - regular (gray) or PTFE/Teflon (white), $1 to $3 at Home Depot (HD) brass air line Tee for 1/4" line, $2.38 at HD brass 1/4" inside diameter air hose end, $1.98 at HD clear vinyl hose, 1/4" ID, $4.49 at HD - you will use 10' of it pressure gauge, Flotec TC2104, $7.99 at HD (0 to 30 PSI) 1/4" inside diameter hose splice kit (this has four of the three hose clamps you need, too), $3.48 at HD Master Cylinder replacement cap - $6 to $11 new, junkyard one should work though and costs less - try your nearest GM dealer, or NAPA or CarQuest or Advance... they may have one in a HELP blister pak just waiting for you. You will also need a couple bottles of "dry gas" - get the cheap generic stuff, not HEET with the additives. You do not want additives, you want alcohol. =========== Directions for making the Shade Tree Mechanic Power Brake Bleeder: Basically, you first clean out the sprayer and the vinyl hose by running some dry gas (alcohol) through them - open the sprayer, pour some in, pump up sprayer, spray out the alcohol safely, then wipe the sprayer dry with a clean lint-free towel, close it back up. Then cut the wand hose to leave enough hose to attach the union, then attach that 10' of vinyl hose to the union. Attach the other end to the tee; put the gauge on the second opening in the tee. Drill a hole in the center of the new master cylinder cap to accept the end fitting (on the bottom) thru to the tee with the gauge and hose on it. The nipple on the end of the fitting is *important* I will explain later. Remove the MC cap (on the MC on the car) and top off the brake fluid. Then with the sprayer bottle up in the engine compartment resting somewhere harmless (like by the air box), attach the new MC cap (the one that has the gauge on it) to the MC. Then open the cap on the sprayer, pour in some brake fluid (pour down the side of the pressure vessel so you don't aerate the fluid). A quart should do for a flush and fill on one car. Screw sprayer back together TIGHTLY. Pump to 15 psi or so--on my sprayer that's about 60 strokes. Now you can go from wheel to wheel, open and close the wheel cylinder bleeders using a brake wrench and one man bleeder, letting each wheel cylinder run until fluid runs clear. Pump more pressure in the sprayer as needed, for me that meant some strokes after each wheel cylinder was flushed and bled. DO NOT PUMP BRISKLY or you will aerate the brake fluid, a serious problem. DO NOT pressurize more than 10-15 PSI. And yes, after each wheel cylinder is bled, check the level of fluid in the sprayer and add fluid if needed. If you do accidentally run dry, it's no disaster due to the design. The air will bubble into the top of the master cylinder reservoir But don't run it dry - that tends to aerate and dampen (from water vapor in the atmosphere) the fluid. As you are doing this, be sure to check for bleeding pressure - all you want is around 15 PSI +/- 2PSI. This is why this device has a gauge installed at the top of the master cylinder, and why you want to use one that is relatively low pressure so it's easier to read from a distance. Again, be sure when you pump, do not pump too vigorously or you will aerate the fluid. You could avoid fluid aeration if you could put fluid in a sac inside the sprayer, or put a bladder around the air pump, but frankly I'm not sure how do either without introducing dirt. When you are done flushing the brake lines and bleeding the brakes, put sprayer on the ground, unscrew the top of the garden sprayer and let the excess air pressure out. The hose assembly will siphon extra fluid out of the MC. ============= Here are pictures of the contraption: First and second pictures - the assembled power bleeder and accessories fit into a plastic storage box, like you get at Target or WalMart. This is *real* important, so things don't get dirty between uses. 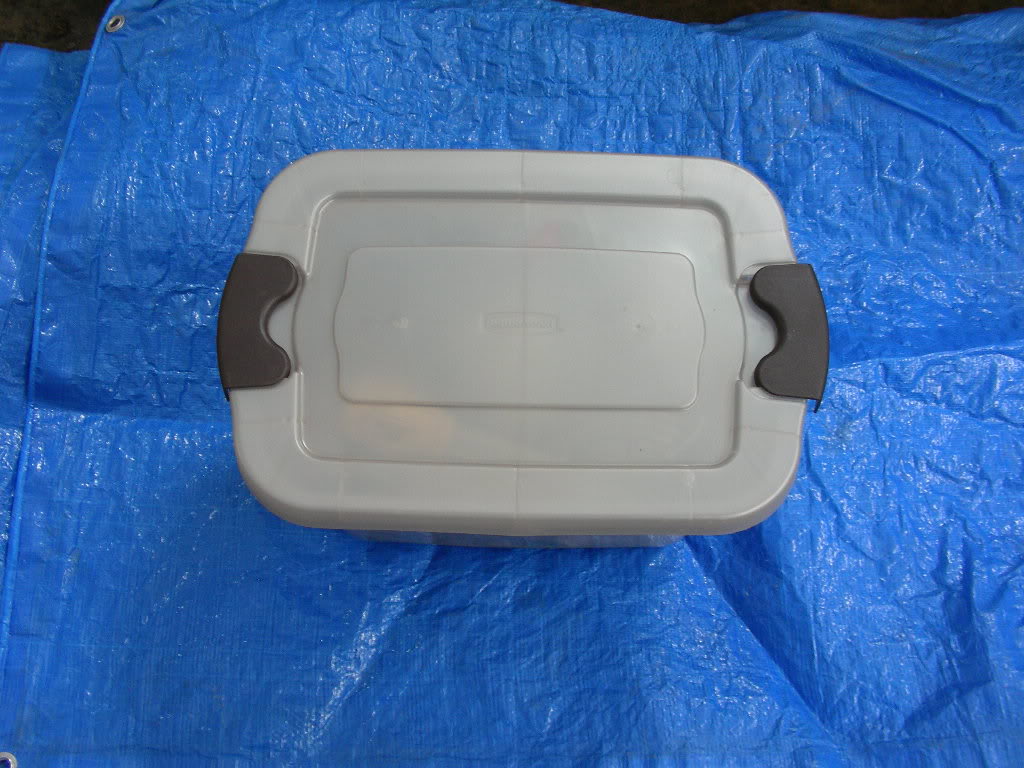  Third picture; I bought an extra master cylinder cap from AutoZone, then used a 1/4 inch drill to make an initial hole through the cap, and a paper punch - right, a common hole punch, they are about a buck each at WalMart - to put a hole in the rubber liner in the cap. To put the hole in the rubber liner, pull it out of the cap (it pops right out if you pull on it) then use the punch to get a hole in it. Be sure that punched hole goes through the cap dead center. The rubber liner then in effect becomes a gasket for the brass fittings so that the assembly will hold air pressure. While you have the rubber liner out, use a chassis reamer to enlarge the hole in the plastic part MC cap to accept the brass fittings. You could use a larger drill but be sure to keep the hole centered and round. You need not thread the MC cap for 2 reasons. One, when you are assembling it, if it is not threaded you can orient the gauge how you want. Two, you do not want the fixture to fail because the cap cracks due to how you threaded it or some nutty thing. Point is to make the hole just big enough to let the threads through, and in the dead center of the cap.  Third picture, continued: looking closely you can see that the rubber cap liner poofs up real nice around the brass male hose end that you are going to install in the MC cap. That's why you use a hole punch for it, so it will poof up just right and it won't tear. You have to smear a little - JUST A LITTLE - black or blue form-a-gasket on the side of the cap that will touch the rubber, including enough to plug the little vent channel there. Don't get any on the inside of the hole, or it will transfer to the threads and you don't want that. Stretch the rubber around the threaded part of the hose end, then push the threads through the cap, put pipe compound on to fill the exposed threads, and screw the hose end into the tee. Don't tighten it yet - put the cap on the MC (don't get any alcohol or dirt in the MC) and align the tee so the opening in the middle of the tee points toward the front of the car. NOW tighten the hose end - just slip a deep well socket over it and crank it down snug enough. You may need to use an adjustable or open-end wrench to hold the tee. Be sure not to crank it down so hard that it tears the rubber liner or cracks the MC cap. It will be fine when the pipe compound dries if you used enough pipe compound. Fourth picture: By looking at the pack of hose ends next to the assembly, you can see that the threaded part of the hose end is long enough to go through the MC cap and into the tee. 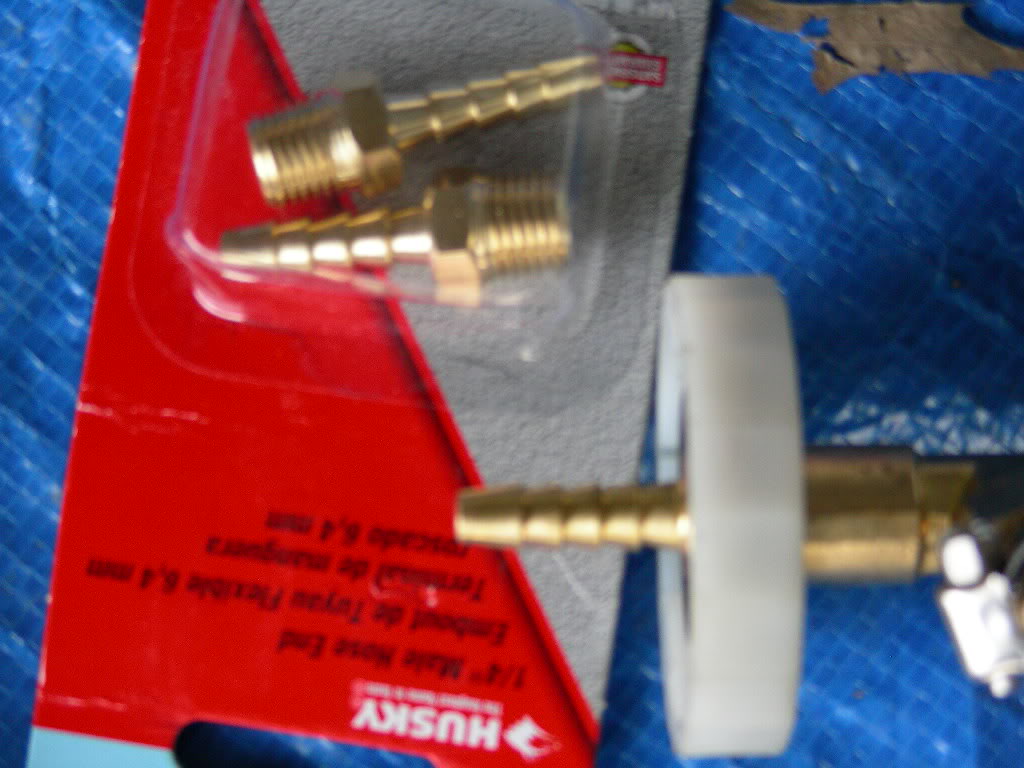 Fifth and sixth pictures: So there's a tee on top of the cap, the gauge on top of the tee, the line to the canister on the side of the tee and a hose end nipple fitting (threaded one side and a graduated conical cylinder, the nipple, on the other) under the cap. That was so I could get that siphon action to correct the level of the fluid in the MC when I release the pressure.  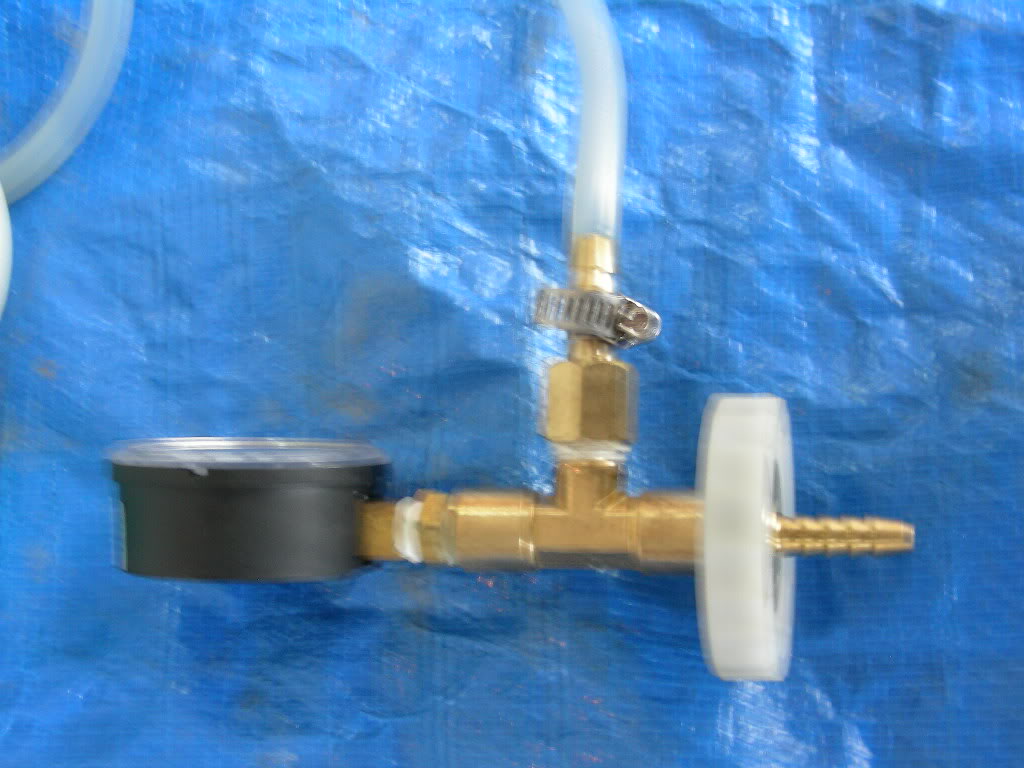 Seventh picture: to install the hose onto the sprayer, just cut it a few inches away from where it's attached to the sprayer bottle and use a brass "I" joiner and a couple of band clamps (preferably stainless steel) to attach them. Most likely the hose from the sprayer will be 1/4" inside diameter. 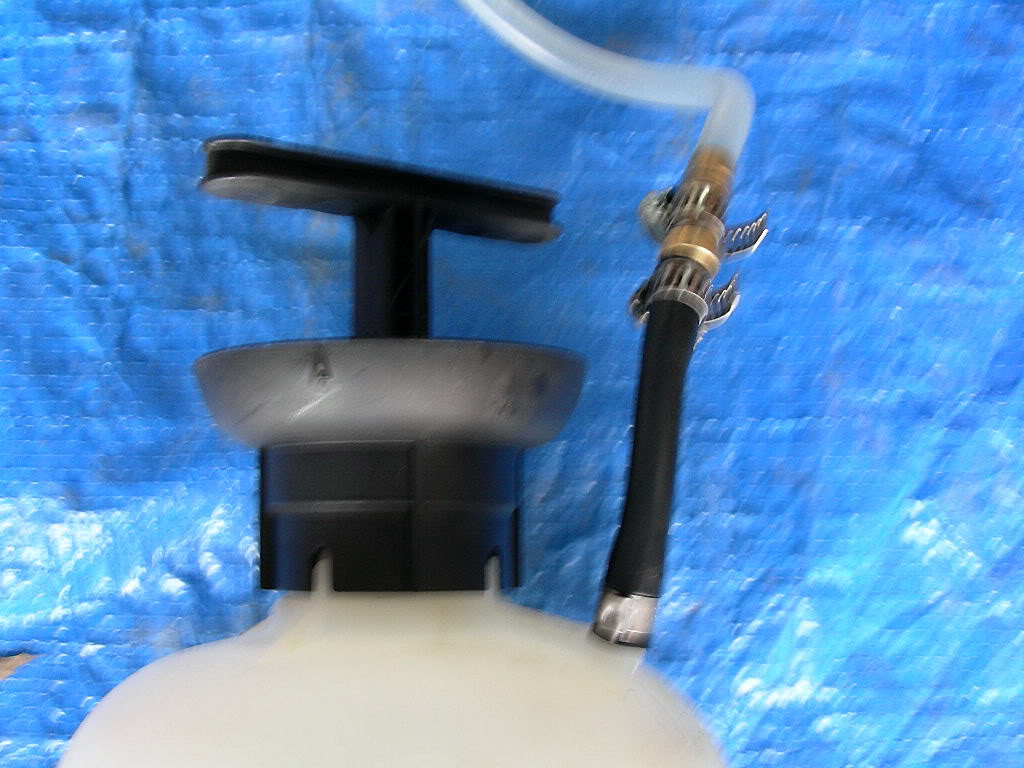 Seventh picture: you will still need a "one man bleeder" bottle, they are pretty cheap at CarQuest or AutoZone. The power bleeder replaces that foot pumping you used to have to do, and now you can see the old dark fluid and the air bubbles as they come out instead of trying to guess. 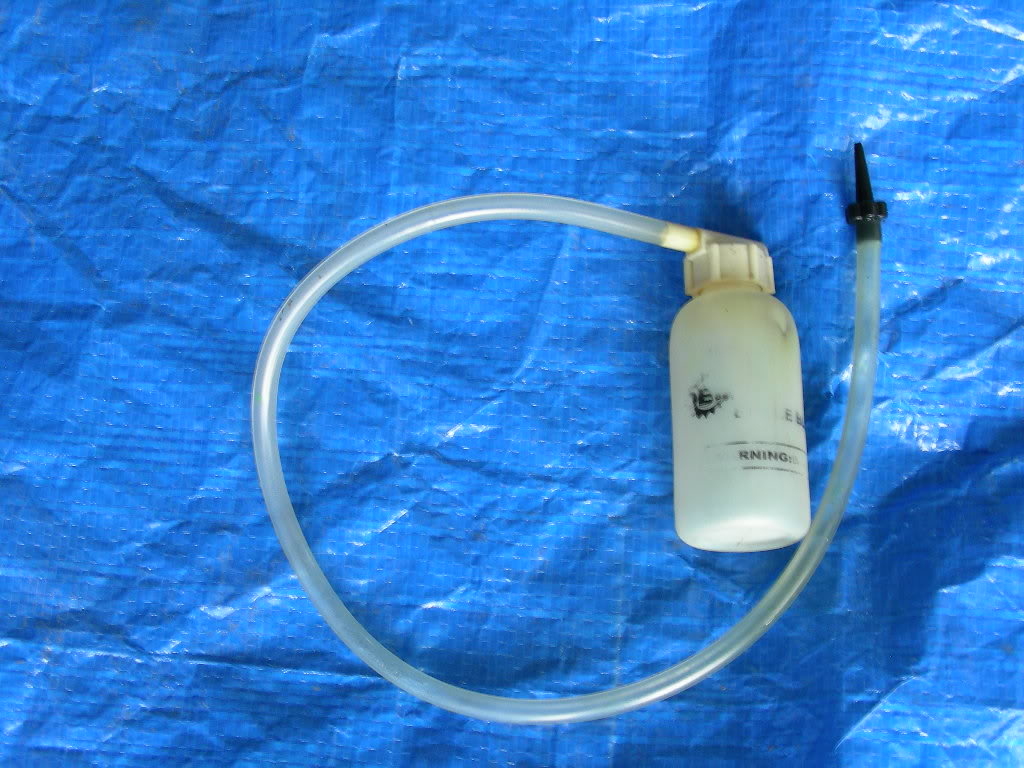 Eighth picture: be sure to use a Sharpie or other fine point permanent marker or labeler to mark the sprayer bottle. I put on it the date I made it, how to clean it, and what grade brake fluid it's for.  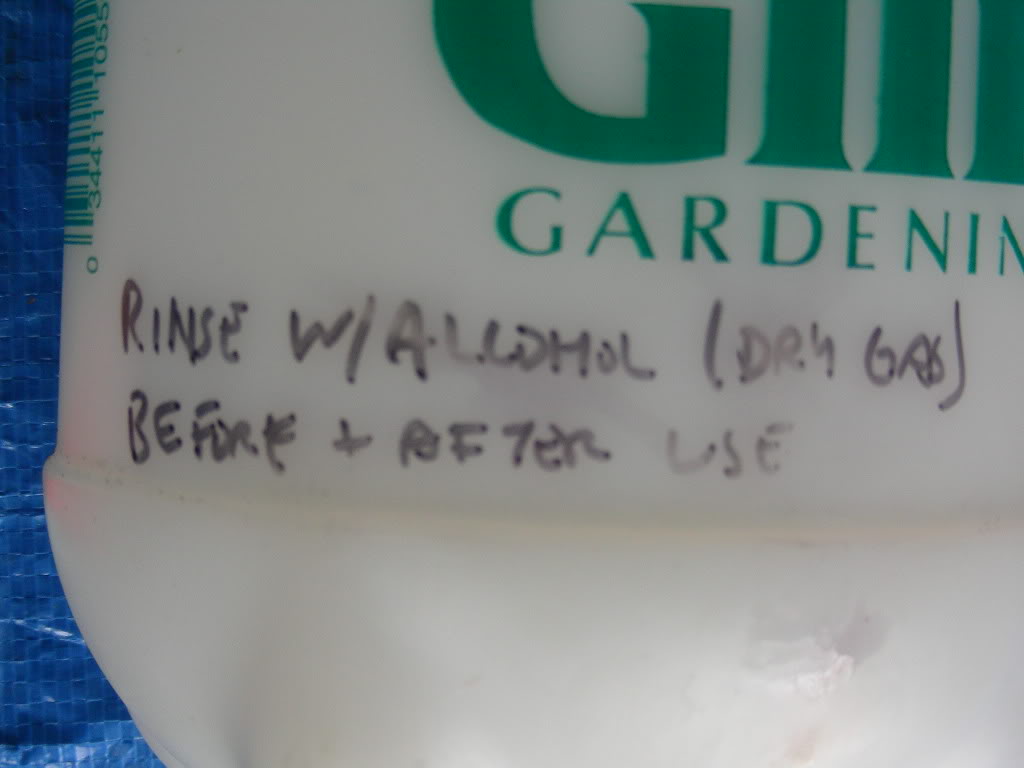 Finally - clean the whole works up with dry gas (100% isopropyl, methyl or ethyl alcohol) and wha-la you are done making your "shade-tree mechanic" power bleeder. If you decide to make and use it, it's at your own risk, including figuring out that when you flush your brakes you'll use up about a one-quart bottle of brake fluid from your favorite auto parts store. Albertj
Last edited by albertj on Wed Aug 12, 2009 11:03 pm; edited 2 times in total | |
| | | | albertj
Master
Name :
Location : Finger Lakes of New York State
Joined : 2007-05-31
Post Count : 8599
Merit : 180
| | Subject: Re: Write-Up: Make a Brake Bleeder Sat Jan 24, 2009 8:38 pm | |
| I apologize for not getting the pictures up, I don't have an account on flickr or whatever to do that. But if one of you want to help out I'm game.
Albertj | |
| | | | TType_Riviera
Fanatic

Name : Rob
Age : 41
Location : ohio
Joined : 2007-03-05
Post Count : 422
Merit : 0
| | Subject: Re: Write-Up: Make a Brake Bleeder Sun Jan 25, 2009 12:56 am | |
| photobucket is your friend | |
| | | | albertj
Master
Name :
Location : Finger Lakes of New York State
Joined : 2007-05-31
Post Count : 8599
Merit : 180
| | Subject: Re: Write-Up: Make a Brake Bleeder Sun Jan 25, 2009 1:28 am | |
| I get 'runtime errors' trying to get into Photobucket. Not sure what to do about it.
Albertj | |
| | | | TType_Riviera
Fanatic
Name : Rob
Age : 41
Location : ohio
Joined : 2007-03-05
Post Count : 422
Merit : 0
| | Subject: Re: Write-Up: Make a Brake Bleeder Sun Jan 25, 2009 1:29 am | |
| | |
| | | | albertj
Master
Name :
Location : Finger Lakes of New York State
Joined : 2007-05-31
Post Count : 8599
Merit : 180
| | Subject: Re: Write-Up: Make a Brake Bleeder Wed Aug 12, 2009 10:40 pm | |
| I edited the write up to include pictures of the bleeder construction that are now posted in Photobucket.
Albertj | |
| | | | AA
Administrator
Name : Aaron
Age : 46
Location : C-bus, Ohio
Joined : 2007-01-13
Post Count : 18448
Merit : 252
| | Subject: Re: Write-Up: Make a Brake Bleeder Wed Aug 12, 2009 11:32 pm | |
| Thanks for the images, Albertj. Certainly is an interesting project. The only downside to this would be the cost at ~$40. For a about the same price and no assembly, you can buy one of these:  Still, I think your method enables a better understanding of how it works, and probably better maintenance ability & cleaning. _________________ '05 GTO 6.0L • 6-spd • 95k miles • 0-60: 4.8s • 16.9 avg MPG • Nelson Ledges Lap: 1:26'95 Celica GT 2.2L • 5-spd • 165k miles • 0-60: yes'98 SC Riviera • 281k miles • 298 HP/370 TQ • 0-60: 5.79s • ET: 13.97 @ 99.28 • 4087 lb • 20.1 avg MPG • Nelson Ledges Lap: 1:30
3.4" pulley • AL104 plugs • 180º t-stat • FWI w/K&N • 1.9:1 rockers • OR pushrods • LS6 valve springs • SLP headers • ZZP fuel rails
KYB GR2 struts • MaxAir shocks • Addco sway bars • UMI bushings • GM STB • Enkei 18" EV5s w/ Dunlop DZ101s • F-body calipers
EBC bluestuff/Hawk HP plus • SS lines • Brembo slotted discs • DHP tuned • Aeroforce • Hidden Hitch^^^ SOLD ^^^ '70 Ninety-Eight Holiday Coupe 455cid • 116k miles^^^ SOLD ^^^ | |
| | | | albertj
Master
Name :
Location : Finger Lakes of New York State
Joined : 2007-05-31
Post Count : 8599
Merit : 180
| | Subject: Re: Write-Up: Make a Brake Bleeder Thu Aug 13, 2009 1:55 am | |
| From a price perspective you are more or less right, except...
1) the sprayers are fluid-tight and cheap.
2) At the working pressures (15 PSI) a fancier pressure vessel is not really needed.
3) With my approach you don't need to recheck the master cylinder fluid level while flushing the system.
4) when you are done the siphon feature with my approach sets the MC fluid level exactly right.
Also about your hand vac - I have one of those. It is doable but tedious to do a good flush of an entire brake system with a hand vac because you have to suck so much fluid and get up several times to recheck/refill the master cylinder.
On the other hand with my approach you also don't have to guess whether you have all the air out of the system - with mine you still use the 1-man bleeder; you can see the fluid in the little bottle.
I admit that for a 1-axle brake job my approach could be overkill. For a 2-axle job that includes fluid replacement, however, I'd consider it. The parts might not run you $40 if you go elsewhere besides Home Depot.
Albertj
Last edited by albertj on Thu Aug 13, 2009 2:02 am; edited 1 time in total | |
| | | | AA
Administrator
Name : Aaron
Age : 46
Location : C-bus, Ohio
Joined : 2007-01-13
Post Count : 18448
Merit : 252
| | Subject: Re: Write-Up: Make a Brake Bleeder Thu Aug 13, 2009 2:01 am | |
| I guess I'm confused about how this would work. Why don't you need to check the master cylinder? Doesn't this bleed fluid out from the calipers? Is there a return hose that goes back to the MC? _________________ '05 GTO 6.0L • 6-spd • 95k miles • 0-60: 4.8s • 16.9 avg MPG • Nelson Ledges Lap: 1:26'95 Celica GT 2.2L • 5-spd • 165k miles • 0-60: yes'98 SC Riviera • 281k miles • 298 HP/370 TQ • 0-60: 5.79s • ET: 13.97 @ 99.28 • 4087 lb • 20.1 avg MPG • Nelson Ledges Lap: 1:30
3.4" pulley • AL104 plugs • 180º t-stat • FWI w/K&N • 1.9:1 rockers • OR pushrods • LS6 valve springs • SLP headers • ZZP fuel rails
KYB GR2 struts • MaxAir shocks • Addco sway bars • UMI bushings • GM STB • Enkei 18" EV5s w/ Dunlop DZ101s • F-body calipers
EBC bluestuff/Hawk HP plus • SS lines • Brembo slotted discs • DHP tuned • Aeroforce • Hidden Hitch^^^ SOLD ^^^ '70 Ninety-Eight Holiday Coupe 455cid • 116k miles^^^ SOLD ^^^ | |
| | | | robotennis61
Guru

Name : robotennis
Age : 62
Location : las vegas
Joined : 2007-12-17
Post Count : 5562
Merit : 143
| | Subject: Re: Write-Up: Make a Brake Bleeder Thu Aug 13, 2009 2:01 am | |
| someone mentioned to me the "gravity bleed method" it involves opening all the bleeders a crack ,with containers to catch old fluid,turning upsidedown and into the master cylinder mouth,and entire bottle of break fluid. leave overnight. the system will bleed entirely ,slowly overnight without having to monitor the fluid. my guess is the big bottle of BF will do the trick with fluid to spare. gravity will do the rest. the system will bleed totally. my mech friends swear by this when they do the job themselves and dont want to hastle with pumping and what not. just a crack open the bleeders. it works. | |
| | | | albertj
Master
Name :
Location : Finger Lakes of New York State
Joined : 2007-05-31
Post Count : 8599
Merit : 180
| | Subject: Re: Write-Up: Make a Brake Bleeder Thu Aug 13, 2009 2:06 am | |
| - robotennis61 wrote:
- someone mentioned to me the "gravity bleed method" it involves opening all the bleeders a crack ,with containers to catch old fluid,turning upsidedown and into the master cylinder mouth,and entire bottle of break fluid. leave overnight. the system will bleed entirely ,slowly overnight without having to monitor the fluid. my guess is the big bottle of BF will do the trick with fluid to spare. gravity will do the rest. the system will bleed totally. my mech friends swear by this when they do the job themselves and dont want to hastle with pumping and what not. just a crack open the bleeders. it works.
And your car is tied up overnight, and the hygroscopic brake fluid takes on moisture from the air in the meantime. Not enough to kill it but enough to noticeably darken the fluid. Your mech friends might not be concerned about the down time or the water vapor issues, though, which I understand. Albertj | |
| | | | robotennis61
Guru
Name : robotennis
Age : 62
Location : las vegas
Joined : 2007-12-17
Post Count : 5562
Merit : 143
| | Subject: Re: Write-Up: Make a Brake Bleeder Thu Aug 13, 2009 2:24 am | |
| personally i have never tried it. for me it would not be an issue living in vegas where humidity is not a real concern. but how much moisture can BF absorb overnight? and if the car is raised and the bleeders cracked and system bled and the bleeders tightened in the morn. i dont see alot of down time. one needs to sleep? i would be willing to try this method. my mech friends have done this to their own cars in NY where humidity is high...its an interesting method no less...ill test it and report back.... | |
| | | | albertj
Master
Name :
Location : Finger Lakes of New York State
Joined : 2007-05-31
Post Count : 8599
Merit : 180
| | Subject: Re: Write-Up: Make a Brake Bleeder Thu Aug 13, 2009 2:32 am | |
| - AA wrote:
- I guess I'm confused about how this would work. Why don't you need to check the master cylinder? Doesn't this bleed fluid out from the calipers? Is there a return hose that goes back to the MC?
Again, this is all at your own risk. That said... You don't need to check the MC because when you set up the bleeder, the new cap-and-gauge gizmo you made seals the system (remember, we blocked the cap vent with silicone). As for the calipers, you control the bleed-out by opening and closing the bleeder screws. The working pressure for effective bleeding is very low, actually, relative to working pressure of the brake system. The bleed pressure is 15 to 20 psi - and by the way 15 psi is about 1/2 the level of pressure needed for example to make a household water system work (that's about 30-60 psi for household water by the way, some municipal systems have even more pressure). If fluid leaks past the caliper pistons at 15 psi, you need a new caliper and it's good you found out this way rather than on the highway. Take it much past 20 PSI and most likely the cap-and-gauge seal, if not the device itself, should fail. Anyway... as you bleed each caliper, you dump the fluid that you bled - along with any residual water or contaminants. Start with the wheel cylinder farthest from the MC. As you bleed each wheel you check the gauge at the MC, and maybe give the sprayer pump a few strokes to pump it up to 15 psi pressure then open the next bleeder and let fluid run until clear. Dispose of the bled fluid. When you have bled all four wheel cylinders, the MC is full of clean fluid. So when you are done bleeding there is still residual pressure in the power bleeder and the MC. You can read that pressure on the gauge. So when you loosen the pump from the top of the sprayer bottle, it hisses as the air in the bottle escapes and the excess fluid (under the bleeding pressure) is siphoned out of the MC back into the bottle. Because of how the nipple is positioned under the cap and gauge, the siphon breaks at the "full" level on the MC reservoir, leaving just the right amount of clean, clear fluid in the MC. Albertj | |
| | | | albertj
Master
Name :
Location : Finger Lakes of New York State
Joined : 2007-05-31
Post Count : 8599
Merit : 180
| | Subject: Re: Write-Up: Make a Brake Bleeder Thu Aug 13, 2009 3:04 am | |
| - robotennis61 wrote:
- personally i have never tried it. for me it would not be an issue living in vegas where humidity is not a real concern. but how much moisture can BF absorb overnight? and if the car is raised and the bleeders cracked and system bled and the bleeders tightened in the morn. i dont see alot of down time. one needs to sleep? i would be willing to try this method. my mech friends have done this to their own cars in NY where humidity is high...its an interesting method no less...ill test it and report back....
It's your car and your risk. As for me, I would not do gravity bleeding because I was once told that brake systems made with ABS (including the Riv) have, in general, smaller bore hard-lines, and overall smaller fluid volumes in the systems. If the car is raised and the bleeders cracked open, then tightened in the morning, you may be guaranteeing a trip to the mechanic if for instance part of the system runs dry for whatever reason. Then the problem will be that you'll get air in the ABS that you won't be able to get out unless you have a TechII scanner to run the ABS purge cycle. Simply refilling the system will not work. That is, once you get air in the ABS servo, pumping the brakes won't get the air out and it will likely give you (a) a soft pedal in regular braking (b) no immediate reaction when the ABS is called for by the brake/traction management mapping. Will the BF take on moisture from the air overnight? Definitely even in Vegas. With DOT3 you can tell by the color of the fluid; as it takes on moisture it turns brownish. Will that amount of moisture cause a problem? I kind of doubt it but I already have so many problems, I don't need to self-inflict one more. Albertj | |
| | | | AA
Administrator
Name : Aaron
Age : 46
Location : C-bus, Ohio
Joined : 2007-01-13
Post Count : 18448
Merit : 252
| | Subject: Re: Write-Up: Make a Brake Bleeder Thu Aug 13, 2009 3:44 am | |
| All right, that's pretty neat, Albertj. I follow you now. If I didn't already have the Mighty Vac I might try building one of these. I may still build the special cap thingy to fill the MC with fresh fluid - can use it with my existing set-up.
robotennis, I've tried the gravity bleeding method before. I don't like it too much for the following reasons:
• It's kind of messy letting the fluid drip all over the calipers and rotors, and your floor. My calipers are painted, so it would all be eaten away by the brake fluid. Unless you fit a length of tubing on each bleeder, aimed into 4 collector bottles, then it might be good.
• It won't get as many bubbles out of the system like a vacuum pump can. Air and dirt sticks in areas like the ABS and in small corners of lines & calipers. The more pressure you have going through, the better chance of evacuating bubbles and dirt particles. Pedal bleeding used to be the best, but the manual recommends against it for the Riviera with ABS. Think of gravity bleed as a fluid "change", and a pressurized bleed as a "flush". The flush is going to get more of the bad stuff out of the lines.
• There is the possibility of bleeding dry if you don't tend to the car in time. This lets air into the lines and could screw up your entire day unless you bleed each wheel all over again, and probably once more for good measure.
• I agree with Albertj about the water absorption. Even out west, there is some humidity in the air, usually 25-50%. That's low, but still some water can absorb into the brake fluid as long as it's exposed to the air. And all night long is a pretty good opportunity for this to happen. If your fluid does become "wet", the car will seem to stop just fine, but the fluid's boiling point drops significantly. This means when things get hot during a hard stop, the fluid will start to boil in the lines, and that's not good. Also, water in the lines will corrode the lines and the ABS system from the inside out. When you see fluid that has become dark brown in color, that's mostly evidence of rust particles in the line. To my knowledge, brake fluid doesn't just turn dark from absorbing water alone. That's why there are test strips made more measuring fluid/water %. Fluid can look fine and still be "wet". By the time it's dark, the damage has already begun.
• Finally, it just takes so damn long to gravity bleed. The vac pump speeds things up maybe 20x with no ill consequence, so why not? The only drawback is the $30 I paid, but it's a tool well worth having, imo. This way you KNOW the fluid won't be exposed to the air long enough to absorb much water, because you can bleed each wheel in about 5 mins and then cover up the MC. Done
There's a lot of different opinions on how to manage brake fluid. The Buick dealership near me said that it should never need changing for the life of the car, but I don't believe that at all! I guess I would rather not take any chances with this stuff. When the ABS system fails, it's not cheap to repair, and when the brakes go into fading, it's usually when you need them most. Water absorbed in the fluid is a major cause for both of these problems. _________________ '05 GTO 6.0L • 6-spd • 95k miles • 0-60: 4.8s • 16.9 avg MPG • Nelson Ledges Lap: 1:26'95 Celica GT 2.2L • 5-spd • 165k miles • 0-60: yes'98 SC Riviera • 281k miles • 298 HP/370 TQ • 0-60: 5.79s • ET: 13.97 @ 99.28 • 4087 lb • 20.1 avg MPG • Nelson Ledges Lap: 1:30
3.4" pulley • AL104 plugs • 180º t-stat • FWI w/K&N • 1.9:1 rockers • OR pushrods • LS6 valve springs • SLP headers • ZZP fuel rails
KYB GR2 struts • MaxAir shocks • Addco sway bars • UMI bushings • GM STB • Enkei 18" EV5s w/ Dunlop DZ101s • F-body calipers
EBC bluestuff/Hawk HP plus • SS lines • Brembo slotted discs • DHP tuned • Aeroforce • Hidden Hitch^^^ SOLD ^^^ '70 Ninety-Eight Holiday Coupe 455cid • 116k miles^^^ SOLD ^^^ | |
| | | | robotennis61
Guru
Name : robotennis
Age : 62
Location : las vegas
Joined : 2007-12-17
Post Count : 5562
Merit : 143
| | Subject: Re: Write-Up: Make a Brake Bleeder Thu Aug 13, 2009 10:14 am | |
| what about instaling speed bleeders? u can flush a system completely this way too. gravity is our friend | |
| | | | AA
Administrator
Name : Aaron
Age : 46
Location : C-bus, Ohio
Joined : 2007-01-13
Post Count : 18448
Merit : 252
| | Subject: Re: Write-Up: Make a Brake Bleeder Thu Aug 13, 2009 10:52 am | |
| Really, I'm not trying to make anyone out to be wrong, I just want us all to become more knowledgeable on the subject. Here's what I believe, based on some research, and personal experience with bleeding brake systems maybe a dozen or so times:
Gravity bleeding is not a flush, it's a fluid change.
Gravity bleeding saves money in not buying/building a vac pump, but otherwise, what's the benefit? What is the reason for not flushing a brake line of air, water, & contaminants? Maybe there is a good reason, I don't know.
Gravity < Vacuum just as N/A < Supercharged
Vacuum pumps do the same thing as gravity, but 20x faster, and it flushes dirt and air out better, imo. It's like a power adder for gravity bleeding. It's like milking a cow with a pump, lol!
I don't trust speed bleeders, and don't really understand why you'd want them - do they let the fluid drip out any faster? FYI, a quick search on speed bleeder found this thread on corvetteforums:
http://forums.corvetteforum.com/autocrossing-and-roadracing/840664-problem-with-speed-bleeders.html
Selected quotes from the thread:
"I installed the speed bleeders on all four corners. They seemed to be a bit long and go in a bit too loose. When I pressed the brake pedal I was getting fluid leakage from around the thread area in addition to the fluid from the main hole."
"I had the same experience when I put them on my C4. The bleed nipple on the Speedbleeder was smaller than the regular bleed valves and the hose didn't fit tight when flushing."
"However, after installing the two rears, I could not get one of them to be completely leak-free so I removed both and went back to stock. I'm thinking about a Motive Power Bleeder to speed up the bleeding process."
"That's the way to go Cass. I used a power bleeder this weekend and it is better than any other method I've used to flush the system."
"I have lost ALL faith in speed bleeders. They leak over time. Maybe not the guy that just installed them, but give them 2 years. I pulled all of mine out and put the stockers back on."
"After they are used so many times the thread sealant wears off of the threads and alows air to enter during the bleeding process. I just put new ones on every year."
"I use a very simple electric powered A/C freon vacuum pump...The brake fluid goes into a glass jar and I can see the fluid through the clear hoses. This beats 2 man and pressure sprayer bleeding any day. No air is ever introduced since the vacuum only goes one way. Very easy to use." _________________ '05 GTO 6.0L • 6-spd • 95k miles • 0-60: 4.8s • 16.9 avg MPG • Nelson Ledges Lap: 1:26'95 Celica GT 2.2L • 5-spd • 165k miles • 0-60: yes'98 SC Riviera • 281k miles • 298 HP/370 TQ • 0-60: 5.79s • ET: 13.97 @ 99.28 • 4087 lb • 20.1 avg MPG • Nelson Ledges Lap: 1:30
3.4" pulley • AL104 plugs • 180º t-stat • FWI w/K&N • 1.9:1 rockers • OR pushrods • LS6 valve springs • SLP headers • ZZP fuel rails
KYB GR2 struts • MaxAir shocks • Addco sway bars • UMI bushings • GM STB • Enkei 18" EV5s w/ Dunlop DZ101s • F-body calipers
EBC bluestuff/Hawk HP plus • SS lines • Brembo slotted discs • DHP tuned • Aeroforce • Hidden Hitch^^^ SOLD ^^^ '70 Ninety-Eight Holiday Coupe 455cid • 116k miles^^^ SOLD ^^^ | |
| | | | robotennis61
Guru
Name : robotennis
Age : 62
Location : las vegas
Joined : 2007-12-17
Post Count : 5562
Merit : 143
| | Subject: Re: Write-Up: Make a Brake Bleeder Thu Aug 13, 2009 11:41 am | |
| | |
| | | | Sponsored content
| | Subject: Re: Write-Up: Make a Brake Bleeder | |
| |
| | | | | | Write-Up: Make a Brake Bleeder | |
|
Similar topics | |
|
| | Permissions in this forum: | You cannot reply to topics in this forum
| |
| |
| |
|


