| | Write-Up: Changing Water Pump (Series I) |  |
|
+7etosino2009 BillBoost37 palermocorey90 Mr.Riviera Sag 95_River 98riv 11 posters |
| Author | Message |
|---|
98riv
Moderator
Location : USA
Joined : 2007-01-14
Post Count : 995
Merit : 30
| | Subject: Write-Up: Changing Water Pump (Series I) Mon Jan 15, 2007 8:01 pm | |
| Changing the Water Pump on a '95 SC
This was borrowed from the Bonneville Club
This is information about how to replace the water pump on a 95ssei. I’m sure that other years will be pretty close. When doing this remember where you put all of the bolts, and make sure you get everything back in the right position. If you see right or left anywhere in the write up I’m talking from the perspective of sitting in the drivers seat, not standing in front of the car.
1. Remove the negative battery cable
2. Jack up the car on the right front, remove the tire and the guards. This allows easy access to some of the bolts you’ll need to get out.
3. Next take off the skirt on the front of your car, because you’ll need to get around that to loosen the butterfly nut to drain the radiator.
4. Drain the radiator of coolant. The nut is on the left front of the car, and is a little hard to get to.
5. Take off all of your belts, try to remember where they go.
6. Now comes the fun part… Jack up a piece of wood under the transmission and the oil pan. You only need it to support the right side of the engine. Once that is done you can remove the engine mount, half of it will come off don’t worry about the other part, you can move it around as needed.
7. Once that is done take off the four bolts that hold on the WP pulley, and remove that pulley.
8. Take off the idle pulley’s that are in the way of the water pump bolts.
9. When you get here you should notice that you can get to all of the bolts…….. But one. You’ll see that the mounting bracket that mounts the PS pump and alternator is covering one of the bolts.
10. To get to the bolt, you must remove the alternator completely. There are a few small bolts too that hold the mounting bracket in place. Be sure to get them all. You’ll have to remove the heater core hoses to get to one of them.
11. Then you need to remove the PS pump. You can leave the pump in the engine, but there is a bolt you need to get to directly behind it.
12. After you have loosed every bold you can find. There is one more. This one is on the side of the bracket, and you’ll have to access it from under the wheel well.
13. You should be able to slide the whole piece aside now, and have access to the last water pump bolt.
14. Remove the bolts from the water pump, than take the water pump off.
15. Clean the old gasket material off thoroughly, but be careful… these parts are aluminum.
16. Attach the new WP remembering to put on the new gasket, and use some sealant, because you don’t want to take it apart again for a leak.
17. Reattach the bracket, the PS pump, and the idle pulleys. This will be the easy part… just take you time and try to find the best order to put the thing back together with.
18. After the bracket is in place, reattach the heater core hoses, put the pulley back on the water pump, and replace the alternator.
19. Now reattach the engine mounts. Your engine should now be supported so you can remove the jack from the oil pan/transmission.
20. Replace both of your belts, and reattach the negative battery cable.
21. I recommend flushing out the radiator, then tightening up the butterfly nut to stop the flow from the radiator.
22. Fill your radiator up, than start your car. You’ll want to do this a couple of times as your radiator sucks down some coolant.
23. After a couple of times of doing that when your radiator is cool. Replace the cap, and let your car get warmed up. After it is warm loosen the screw just above the thermostat to clear all the air out of the system.
24. Once that is done check your coolant level again, and add as needed.
25. Now replace the front skirt, and the protectors around the wheel.
26. Set your baby down on all fours again, and take her for a test drive.
I hope I got every step in here. I think that everything is complete. This job will take you a long time, anywhere between 5 and 8 hours. It took me about 7. Good Luck. Is a PITA, but better than paying someone $300 bucks to do it.
Last edited by 98riv on Mon Nov 19, 2012 11:06 pm; edited 1 time in total | |
|
| | |
95_River
Amateur

Name : Brandon
Location : Columbia, SC
Joined : 2007-01-23
Post Count : 32
Merit : 0
| | Subject: Re: Write-Up: Changing Water Pump (Series I) Sun Jan 28, 2007 5:03 pm | |
| Sweet, I have to do this next weekend for my WP is squeeling like a stuck pig. I'm going to take pictures of the removal and install to post here. Thanks for the info!!!!! | |
|
| | |
Sag
Enthusiast

Name : Martin
Age : 42
Location : St- calixte Qc
Joined : 2007-10-26
Post Count : 166
Merit : 0
| | Subject: water pump Sat Jan 26, 2008 4:37 pm | |
| | |
|
| | |
Sag
Enthusiast
Name : Martin
Age : 42
Location : St- calixte Qc
Joined : 2007-10-26
Post Count : 166
Merit : 0
| | Subject: Re: Write-Up: Changing Water Pump (Series I) Sat Jan 26, 2008 5:44 pm | |
| ok i found it it shoud be finished in less than 5 hours(-20 celsius helps a lot)and yes it's a pain in the a$$ to do. | |
|
| | |
Mr.Riviera
Expert

Name : Matthew
Age : 38
Location : Florida
Joined : 2007-01-17
Post Count : 4394
Merit : 101
| | Subject: Re: Write-Up: Changing Water Pump (Series I) Sat Jan 26, 2008 9:59 pm | |
| i feel your pain man. i had my WP go out, and i'm not sure if the S2 and S1 engines are set up the same, but it was not a fun job. glad to hear you got it fixed though  _________________ 1996 with 254k miles, L32 4" FWI -> ported N* -> Ported Gen V w/3.0" Pulley, Stage 3 Phenolic I/C, ZZP FMHE, 1.84 RR, Headers and 3" pipe to mufflers, F-body brakes, and lowered on Eibachs. -RIP AMG C400 White on black. Stage 2 w/E30 - 11.9@117 -daily 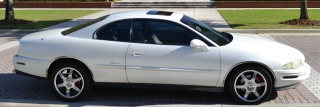 | |
|
| | |
Sag
Enthusiast
Name : Martin
Age : 42
Location : St- calixte Qc
Joined : 2007-10-26
Post Count : 166
Merit : 0
| | Subject: Re: Write-Up: Changing Water Pump (Series I) Sat Jan 26, 2008 11:33 pm | |
| yes but it' cold out there really cold..........  | |
|
| | |
palermocorey90
Expert

Name : Corey
Age : 34
Location : Rome NY
Joined : 2007-10-03
Post Count : 2968
Merit : -24
| | Subject: Re: Write-Up: Changing Water Pump (Series I) Sat Jan 26, 2008 11:40 pm | |
| did u bring it in a garage or something or work out in the snowy crap | |
|
| | |
Sag
Enthusiast
Name : Martin
Age : 42
Location : St- calixte Qc
Joined : 2007-10-26
Post Count : 166
Merit : 0
| | Subject: Re: Write-Up: Changing Water Pump (Series I) Sat Jan 26, 2008 11:44 pm | |
| the garage was full and too small for the riv.....so old school driveway job. | |
|
| | |
palermocorey90
Expert
Name : Corey
Age : 34
Location : Rome NY
Joined : 2007-10-03
Post Count : 2968
Merit : -24
| | Subject: Re: Write-Up: Changing Water Pump (Series I) Sat Jan 26, 2008 11:49 pm | |
| | |
|
| | |
Sag
Enthusiast
Name : Martin
Age : 42
Location : St- calixte Qc
Joined : 2007-10-26
Post Count : 166
Merit : 0
| | Subject: Re: Write-Up: Changing Water Pump (Series I) Sat Jan 26, 2008 11:50 pm | |
| not that bad but my feet are almost crying and anyway i'm crazy | |
|
| | |
BillBoost37
Junkie
Location : Enfield CT
Joined : 2007-11-28
Post Count : 769
Merit : 26
| | Subject: Re: Write-Up: Changing Water Pump (Series I) Mon Jan 28, 2008 7:24 am | |
| One of the biggest helps on the S2 is pulling the studs for the torque axis bracket to remove it. (at least on the Bonnie). Not sure is this applies to the either of the Riv setups....if you had to jack the motor to the moon to get the bracket off, next time remove the studs. | |
|
| | |
etosino2009
Enthusiast

Name : Evan
Age : 34
Location : columbus, ohio
Joined : 2007-08-27
Post Count : 220
Merit : 0
| | Subject: Re: Write-Up: Changing Water Pump (Series I) Sun Oct 12, 2008 4:52 pm | |
| | |
|
| | |
IBx1
Expert

Name : ILAN
Age : 33
Location : College Station, TX
Joined : 2007-12-30
Post Count : 4304
Merit : 69
| | Subject: Re: Write-Up: Changing Water Pump (Series I) Sun Aug 09, 2009 10:02 pm | |
| Hey all, I just got my car back after having the snout bearings and coupler of the S/C changed, and there's one last noise my car is making. Mechanic noted that the water pump pulley is wobbling a little and making a noise, but isn't leaking or really broken. It won't need immediate replacing, but do you guys know what the average price for the water pump and whatever else I'll need is? I'm hoping it won't be an expensive part. | |
|
| | |
96RIVMANN
Fanatic

Name : Paul
Location : MN
Joined : 2007-10-22
Post Count : 253
Merit : 11
| | Subject: Re: Write-Up: Changing Water Pump (Series I) Mon Aug 10, 2009 10:49 pm | |
| Should be about $50 for a new one. It is a PITA to change out though. I wouldn't wait until that pulley comes flying off get it fixed now before you do more damage. | |
|
| | |
llamalor2112
Junkie

Name : Evan
Age : 32
Location : Granite Falls, WA
Joined : 2012-07-13
Post Count : 852
Merit : 13
| | Subject: Re: Write-Up: Changing Water Pump (Series I) Sat Mar 01, 2014 12:54 pm | |
| - JAYARZA wrote:
- Thanks for the excellent write up and pics on changing the water pump for the series 2 engine.
I have the GM shop manual and it was no help; made no mention of the PS pump pulley in the way.
I just completed mine (97 NA) yesterday and it only took a couple of hours and $35. I would only add a couple of tips for the next guy:
No need to raise the engine. You don't need to remove the motor mounts. I completed the whole job in relative ease from leaning over the passenger side fender. It's a little tricky to get the fourth small bolt out of the bottom of the water pump (because you can't see it) but with a little finesse, you won't have too much trouble ratcheting it out.
It is necessary to remove the PS pump. I tried everything around that, because it's a little difficult to line the holes up and put back. You can't just remove the top bolt and spin it out of the way because a stud hits the back of the PS pump pulley, so you have to take both bolts out to move it aside.
Re-use your hardware? My bolts were pretty gummy, but after a few seconds on the wire wheel they worked like new. Just be mindful to not over torque them.
The new pump that I purchased from NAPA was only $35 and was of excellent quality. It also came with a metal gasket that required no additional silicone.
She's back on the road and I was pleasantly surprised of the ease and low cost of this repair... Any of the 95 guys confirm this for the series 1 as well?? W/re to leaving the motor mount on and working around it to get the waterpump off | |
|
| | |
Z-type
Aficionado

Name : Andrew Zamiska
Age : 37
Location : Cecil, PA - 25 miles south of Pittsburgh
Joined : 2009-06-29
Post Count : 1429
Merit : 63
| | Subject: Re: Write-Up: Changing Water Pump (Series I) Sat Mar 01, 2014 7:34 pm | |
| I never changed the pump on my Series I while it was in my old Riv, my cousin did. He didn't mention anything about removing the mount but judging from this picture, it looks like it'll kind of be an inconvenience. 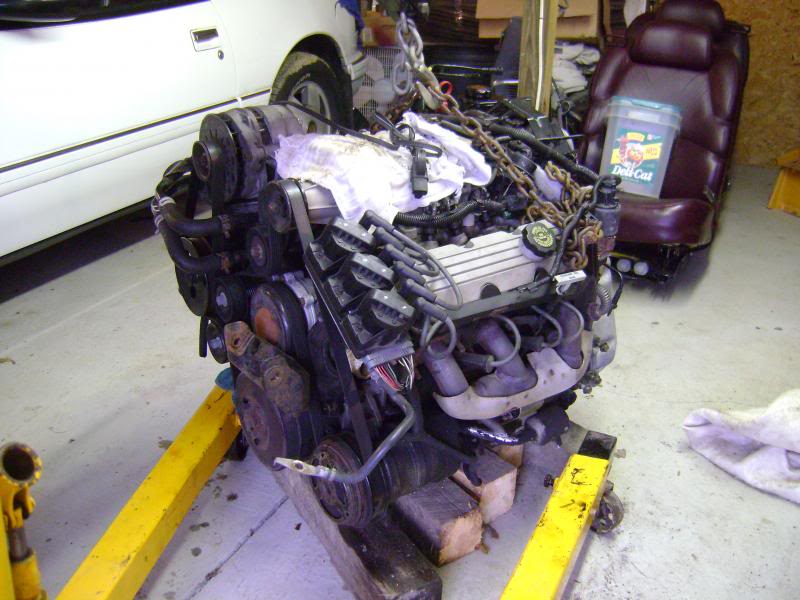 | |
|
| | |
llamalor2112
Junkie
Name : Evan
Age : 32
Location : Granite Falls, WA
Joined : 2012-07-13
Post Count : 852
Merit : 13
| | Subject: Re: Write-Up: Changing Water Pump (Series I) Sat Mar 01, 2014 9:02 pm | |
| ^this. Ehhhh..... Haha I'll give it a go and IF I can manage without removing the mount, I'll buy us all steaks! Ha And I sure hope that's going in the reatta behind it  !!!!Actually man, did you just take this pic in your shop so the engine is still available to get another pic of by chance? | |
|
| | |
Sponsored content
| | Subject: Re: Write-Up: Changing Water Pump (Series I) | |
| |
|
| | |
| | Write-Up: Changing Water Pump (Series I) | |
|