| | Restoration Pics |  |
|
|
|
| Author | Message |
|---|
98inWPB
Member
Name : Ed
Joined : 2020-01-04
Post Count : 79
Merit : 3
| | Subject: Re: Restoration Pics Sun Jan 26, 2020 1:45 am | |
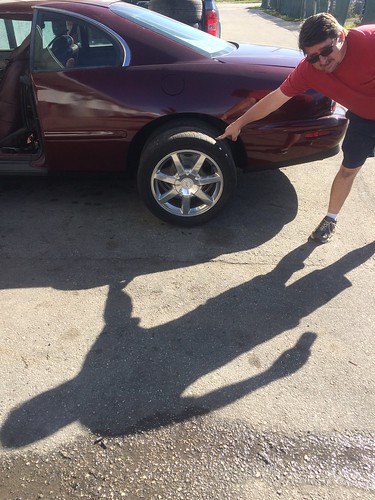
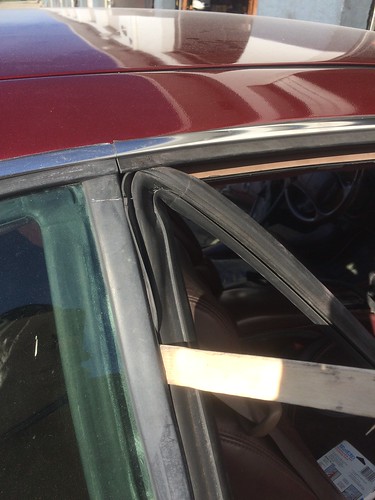
| Back to the parts car to swipe more stuff, among other things, the LF inner fender was lost when a tire blew  bottom cladding front has a Plastic square holding everything, going to need that as well    With the inner fender back in place I brace for the worst: Selecting front fender chrome then deciding if there are enough clips.  There are enough with 3 used ones to spare!  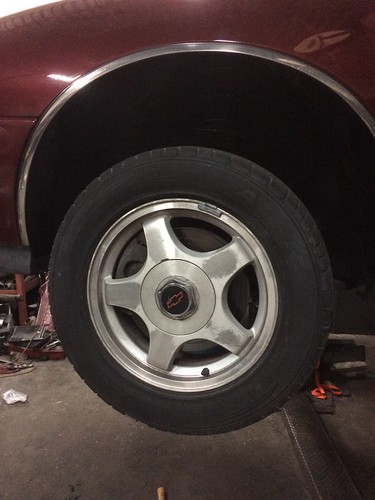  Time to finish up the front end, only 2 things left under the hood, a foam air damn and the hood/fender seal trim Sorry about the crap pic but here is how I removed the seals, to prevent bending, a mechanics pry bar backing a carpentry pry bar. This method popped most of the heads from the plastic push pins but the pieces came off dead straight (unlike the last set bent when I focused on preserving the pins, live and learn priorities)  For this trim  Trim piece in question (Paint is dusty not scratched)  Looking up at the bottom front of hood @ the foam airdam  And last thing we got done this evening, rear bumper marker lamps   Tomorrow will start with door handles, a window motor, mirror wires, weatherstrip and panels with a touch of RF inner fender and possibly some interior work | |
|
| | |
98inWPB
Member
Name : Ed
Joined : 2020-01-04
Post Count : 79
Merit : 3
| | Subject: Re: Restoration Pics Sun Jan 26, 2020 8:31 pm | |
| | |
|
| | |
Jack the R
Master

Joined : 2007-01-16
Post Count : 8072
Merit : 105
| | Subject: Re: Restoration Pics Mon Jan 27, 2020 12:39 am | |
| Caddy rims look nice. What did they come off of? | |
|
| | |
stan
Expert
Joined : 2007-07-01
Post Count : 2558
Merit : 12
| | Subject: Re: Restoration Pics Mon Jan 27, 2020 4:16 am | |
| Ed,why don't u get Riv factory chrome?... with these STS rims the car won't be as elegant as with the factory 7 spoke. | |
|
| | |
98inWPB
Member
Name : Ed
Joined : 2020-01-04
Post Count : 79
Merit : 3
| |
| | |
98inWPB
Member
Name : Ed
Joined : 2020-01-04
Post Count : 79
Merit : 3
| | Subject: Re: Restoration Pics Mon Jan 27, 2020 7:24 am | |
| - stan wrote:
- Ed,why don't u get Riv factory chrome?... with these STS rims the car won't be as elegant as with the factory 7 spoke.
Never thought about it, not only that, have never run across a set, not to mention, I want to go 17in | |
|
| | |
98inWPB
Member
Name : Ed
Joined : 2020-01-04
Post Count : 79
Merit : 3
| | Subject: Re: Restoration Pics Mon Jan 27, 2020 7:31 am | |
| - Jack the R wrote:
- Caddy rims look nice. What did they come off of?
Dont exactly remember, was a 03ish big 4 door northstar on its way to scrap, all I needed to do was substitute some other wheels, cost $0 | |
|
| | |
albertj
Master

Name :
Location : Finger Lakes of New York State
Joined : 2007-05-31
Post Count : 8687
Merit : 181
| | Subject: Re: Restoration Pics Mon Jan 27, 2020 9:40 am | |
| Currently car makers are using a closed-cell-foam sheet in place of the fabric/rubber liner inside the doors. Both materials are available, I think from places like Grainger, see the link https://www.grainger.com/product/GRAINGER-APPROVED-Water-Resistant-Closed-Cell-5GDK0 - they have larger sheets, I think about $24 plus shipping will get you enough to do both doors. Remember to press in a relief pocket for the speaker. Look for "rubber sheets" on the Grainger site and you'll find EPDM and Neoprene thin (1/64", 1/32") sheets the right size.
Currently I have one of each in my car. Many years ago I bought (from GM) but did not install a rubber liner for drivers side, just installed it last year, and put in a foam one on the passenger side. They both work fine for water blocking but the rubber one is loads better at noise control. I don't know what the GM sheets were made of, given that they embrittled after about 10-12 years. | |
|
| | |
98inWPB
Member
Name : Ed
Joined : 2020-01-04
Post Count : 79
Merit : 3
| | Subject: Re: Restoration Pics Mon Jan 27, 2020 12:20 pm | |
| - albertj wrote:
- Currently car makers are using a closed-cell-foam sheet in place of the fabric/rubber liner inside the doors. Both materials are available, I think from places like Grainger, see the link https://www.grainger.com/product/GRAINGER-APPROVED-Water-Resistant-Closed-Cell-5GDK0 - they have larger sheets, I think about $24 plus shipping will get you enough to do both doors. Remember to press in a relief pocket for the speaker. Look for "rubber sheets" on the Grainger site and you'll find EPDM and Neoprene thin (1/64", 1/32") sheets the right size.
Currently I have one of each in my car. Many years ago I bought (from GM) but did not install a rubber liner for drivers side, just installed it last year, and put in a foam one on the passenger side. They both work fine for water blocking but the rubber one is loads better at noise control. I don't know what the GM sheets were made of, given that they embrittled after about 10-12 years. Thanks, have seen it in doors of newer cars worked on but that is not what I am going to be updating, I am mostly concerned with the degradation of the actual door panel, the upholstery and look are still good but no longer strong enough to hold up to daily use. On that note, what can be done for aesthetic inside black trim that tops the door panels? (not the window wipe) | |
|
| | |
albertj
Master
Name :
Location : Finger Lakes of New York State
Joined : 2007-05-31
Post Count : 8687
Merit : 181
| | Subject: Re: Restoration Pics Mon Jan 27, 2020 1:04 pm | |
| The charcoal plastic trim is darn near black if you treat it with Back To Black or Aerospace 303 (my fave).
Overall -- Very Nicely Done, hats off to you.
| |
|
| | |
98inWPB
Member
Name : Ed
Joined : 2020-01-04
Post Count : 79
Merit : 3
| | Subject: Re: Restoration Pics Mon Jan 27, 2020 1:25 pm | |
| - albertj wrote:
- The charcoal plastic trim is darn near black if you treat it with Back To Black or Aerospace 303 (my fave).
Overall -- Very Nicely Done, hats off to you.
Thanks, my focus is the top of the door panel trim is cracked not faded tho.  Still far from done,have the rest of interior to swap from parts car, rear wheel moldings,trunk lock, trunk interior, power antenna and ABS light since the blowout (it's not a sensor issue, RF isolation valve circuit, have to check wiring before condemning module) | |
|
| | |
albertj
Master
Name :
Location : Finger Lakes of New York State
Joined : 2007-05-31
Post Count : 8687
Merit : 181
| | Subject: Re: Restoration Pics Mon Jan 27, 2020 2:54 pm | |
| - 98inWPB wrote:
- albertj wrote:
- The charcoal plastic trim is darn near black if you treat it with Back To Black or Aerospace 303 (my fave).
Overall -- Very Nicely Done, hats off to you.
Thanks, my focus is the top of the door panel trim is cracked not faded tho.
Still far from done,have the rest of interior to swap from parts car, rear wheel moldings,trunk lock, trunk interior, power antenna and ABS light since the blowout (it's not a sensor issue, RF isolation valve circuit, have to check wiring before condemning module) Fish around that Grainger link and see if they offer a trim that would replace the cracked black edge trim at top of door panel. Maybe something like this: https://www.amazon.com/Trim-Lok-Edge-Trim-Protector-Push/dp/B00NL45NQI | |
|
| | |
stan
Expert
Joined : 2007-07-01
Post Count : 2558
Merit : 12
| | Subject: Re: Restoration Pics Mon Jan 27, 2020 3:23 pm | |
| | |
|
| | |
98inWPB
Member
Name : Ed
Joined : 2020-01-04
Post Count : 79
Merit : 3
| | Subject: Re: Restoration Pics Mon Jan 27, 2020 11:58 pm | |
| This morning we mounted the other 3 caddy tires 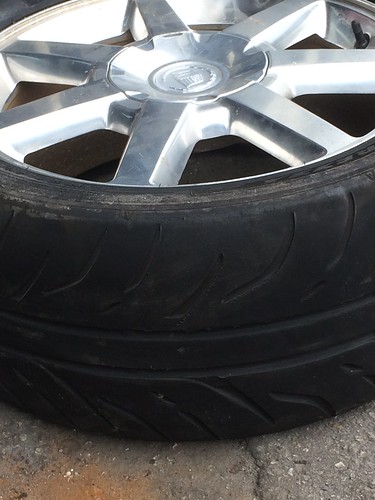 Got rid of these  Then tore off for some fresh 93 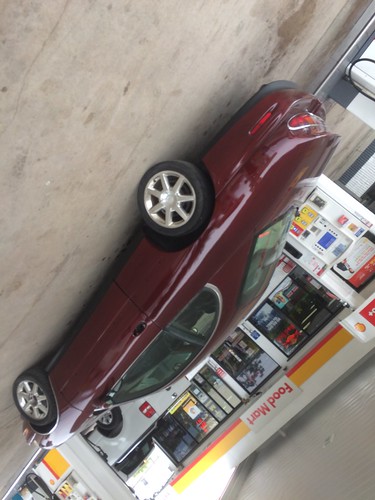 Fishing around in the gutted trunk I find a single, out of place blob of rust   Wire brush  Finish off the almost hard tube of seam seal 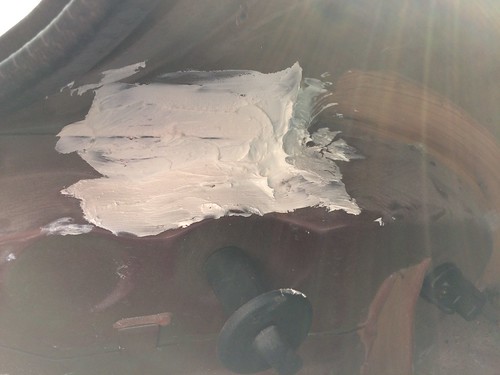 Lunch then car wash  Rear wheel chrome and back bumper buttoned up  The moment that can no longer be put off, the right side trim. When sanding it was noticed they were loose, one piece was barely holding on by a couple last pegs( now there are none) the other was partially installed partially glued over previous, unknown bodywork. They got painted seperatly 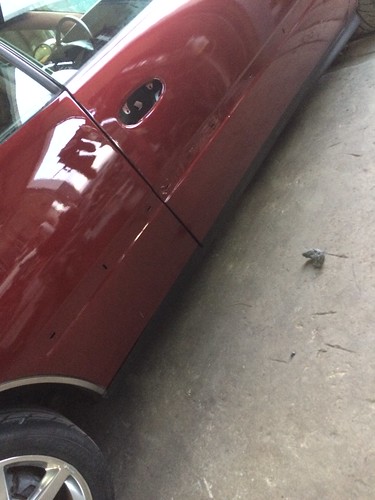 Time to improvise    Door piece still has its front hook and a couple of viable clips, it gets urethane as well  Passenger door handle next. Done for the night  | |
|
| | |
Jack the R
Master
Joined : 2007-01-16
Post Count : 8072
Merit : 105
| | Subject: Re: Restoration Pics Tue Jan 28, 2020 7:24 pm | |
| I think the Caddy rims look great. | |
|
| | |
98inWPB
Member
Name : Ed
Joined : 2020-01-04
Post Count : 79
Merit : 3
| | Subject: Re: Restoration Pics Wed Jan 29, 2020 8:42 am | |
| Thanks, jury is still out about what to do with the large fender gap created by my almost free used race rubber. Much completed then shown this morning, more yesterday pics to come this evening. Window weld did its job but be careful not to get some where it does not belong, please don't ask how I know this  Started detailing bare trunk, there is still more then trace amounts of glass to be found 15 years after the original damage cleanup. Trunk lid harness reinstalled  Pulling tape off found a weak spot, time to black it out.    Flat paint still wet  When fueling the other day it showed the junkyard fuel pump is pretty worn as fuel gauge is sketchy Ordered new  | |
|
| | |
Jack the R
Master
Joined : 2007-01-16
Post Count : 8072
Merit : 105
| | Subject: Re: Restoration Pics Wed Jan 29, 2020 5:03 pm | |
| The overall size of the tire is the same though, isn't it? It looks the same.
I'm not aware of anything you can do about the wheel gap without otherwise compromising the car. The Riv looks nice dropped an inch or so but there are a couple places I've been where the chin spoiler scraped, and my car has the stock ride height.
| |
|
| | |
98inWPB
Member
Name : Ed
Joined : 2020-01-04
Post Count : 79
Merit : 3
| | Subject: Re: Restoration Pics Wed Jan 29, 2020 8:57 pm | |
| - Jack the R wrote:
- The overall size of the tire is the same though, isn't it? It looks the same.
I'm not aware of anything you can do about the wheel gap without otherwise compromising the car. The Riv looks nice dropped an inch or so but there are a couple places I've been where the chin spoiler scraped, and my car has the stock ride height.
Know exactly what you are talking about, I always felt the stock height was still pretty low... bottom out wise. As for the tires, its not good, thinking about pulling another 3/4 height out ouch. According to a tire calculator, overall height changes by -6% or -1.6in between 225-60-16 vs 255-40-17 | |
|
| | |
98inWPB
Member
Name : Ed
Joined : 2020-01-04
Post Count : 79
Merit : 3
| |
| | |
albertj
Master
Name :
Location : Finger Lakes of New York State
Joined : 2007-05-31
Post Count : 8687
Merit : 181
| | Subject: Re: Restoration Pics Thu Jan 30, 2020 10:21 am | |
| Been there done that - use the Claret for headliner. Here are some pics of my car (see the sig) taken last summer. I re-did the interior more than a year ago. Just the A and C pillars, and package tray. I don't smoke so the headliner did not separate.   After about a year of daily outside parking the edges near windows are faded a little. The quality of they dye in the replacement headliner isn't so great. The package tray is "burgundy" and is way too red, but looks picture perfect from outside due to the tinted windows. Quality of that material was superb. | |
|
| | |
98inWPB
Member
Name : Ed
Joined : 2020-01-04
Post Count : 79
Merit : 3
| | Subject: Re: Restoration Pics Thu Jan 30, 2020 11:05 am | |
| - albertj wrote:
- Been there done that - use the Claret for headliner. Here are some pics of my car (see the sig) taken last summer. I re-did the interior more than a year ago. Just the A and C pillars, and package tray. I don't smoke so the headliner did not separate.
After about a year of daily outside parking the edges near windows are faded a little. The quality of they dye in the replacement headliner isn't so great.
The package tray is "burgundy" and is way too red, but looks picture perfect from outside due to the tinted windows. Quality of that material was superb. Was waffling between that and Garnet, not sure what I chose last time but it is too red, not offensive, just red.... Claret it is. Hard to remember if the headliner has been done once or twice in the 10 years I have driven it, package tray twice, pillars I somehow think have been done but only 2 of em (will know more when the interior gets swapped) The quality of dye and fabric is absolute crap compared to factory, I do not smoke so pretty sure its simply the replacement materials. If someone wants to re-do a slightly flawed package tray I say DO NOT! The only reason I did, the windows (and tray)were smashed for a year prior to my ownership, the junkyard replacement was tan, the next one will be factory and red. | |
|
| | |
albertj
Master
Name :
Location : Finger Lakes of New York State
Joined : 2007-05-31
Post Count : 8687
Merit : 181
| | Subject: Re: Restoration Pics Thu Jan 30, 2020 6:20 pm | |
| - 98inWPB wrote:
- albertj wrote:
- Been there done that - use the Claret for headliner. Here are some pics of my car (see the sig) taken last summer. I re-did the interior more than a year ago. Just the A and C pillars, and package tray. I don't smoke so the headliner did not separate.
After about a year of daily outside parking the edges near windows are faded a little. The quality of the dye in the replacement headliner isn't so great.
The package tray is "burgundy" and is way too red, but looks picture perfect from outside due to the tinted windows. Quality of that material was superb.
Was waffling between that and Garnet, not sure what I chose last time but it is too red, not offensive, just red.... Claret it is.
Hard to remember if the headliner has been done once or twice in the 10 years I have driven it, package tray twice, pillars I somehow think have been done but only 2 of em (will know more when the interior gets swapped) The quality of dye and fabric is absolute crap compared to factory, I do not smoke so pretty sure its simply the replacement materials. If someone wants to re-do a slightly flawed package tray I say DO NOT! The only reason I did, the windows (and tray)were smashed for a year prior to my ownership, the junkyard replacement was tan, the next one will be factory and red. I am glad I could post pictures. It's unspeakably difficult to use swatches to see color matches for a project like this. As for the package tray -- after 20 years mine was just, well, done. Cadillac reintroduced this color (or one very close to it) and since you mention it you jogged my memory -- I need to ask my parts guy about yardage. When relatively new GM will sell factory yardage of the interior materials. They've got plain and perforated leather and fabrics in this color. Darned if I recall what they called the color (he he). Pricing is stif but the materials are better than aftermarket - but... It occurred to me that there might be sprays (that actually work) that would slow down the UV attack on the fabric dye (without killing the foam). I saw this (https://www.amazon.com/ForceField-Sunblock-Fabric-Protector-Prevent/dp/B003VAWVR6) but never heard of it. Your thoughts? | |
|
| | |
Jack the R
Master
Joined : 2007-01-16
Post Count : 8072
Merit : 105
| | Subject: Re: Restoration Pics Thu Jan 30, 2020 7:37 pm | |
| Heat is all it takes to melt headliner glue.
A garage is the best friend your car will ever have. | |
|
| | |
Jack the R
Master
Joined : 2007-01-16
Post Count : 8072
Merit : 105
| | Subject: Re: Restoration Pics Thu Jan 30, 2020 7:43 pm | |
| - 98inWPB wrote:
- Jack the R wrote:
- The overall size of the tire is the same though, isn't it? It looks the same.
I'm not aware of anything you can do about the wheel gap without otherwise compromising the car. The Riv looks nice dropped an inch or so but there are a couple places I've been where the chin spoiler scraped, and my car has the stock ride height.
Know exactly what you are talking about, I always felt the stock height was still pretty low... bottom out wise.
As for the tires, its not good, thinking about pulling another 3/4 height out ouch.
According to a tire calculator, overall height changes by -6% or -1.6in between 225-60-16 vs 255-40-17
I really struggle with the wheel/tire issue, and customization in general. 16's and big wheel wells are very out of fashion, but the Riv rides so well on the stock suspension and tire package. I don't do a lot of corner carving. Handling is more cool than ride quality but I get more use out of ride quality. Now that there are so few Rivs out there, I lean more towards keeping it stock and having another car for performance. | |
|
| | |
98inWPB
Member
Name : Ed
Joined : 2020-01-04
Post Count : 79
Merit : 3
| | Subject: Re: Restoration Pics Fri Jan 31, 2020 7:22 am | |
| - albertj wrote:
Cadillac reintroduced this color (or one very close to it) and since you mention it you jogged my memory -- I need to ask my parts guy about yardage. When relatively new GM will sell factory yardage of the interior materials. They've got plain and perforated leather and fabrics in this color. Darned if I recall what they called the color (he he). Pricing is stif but the materials are better than aftermarket - but... It occurred to me that there might be sprays (that actually work) that would slow down the UV attack on the fabric dye (without killing the foam). I saw this (https://www.amazon.com/ForceField-Sunblock-Fabric-Protector-Prevent/dp/B003VAWVR6) but never heard of it. Your thoughts? With a generic trim shop next door, I never thought to ask the dealer for raw materials, also, never thought about fading from a preventative standpoint, thank you for the ideas  | |
|
| | |
Sponsored content
| | Subject: Re: Restoration Pics | |
| |
|
| | |
| | Restoration Pics | |
|