| | Write-Up: Installing Boost Gauge |  |
|
+73RidzRiv 1997riv bigdave bmcd9179 stan joshuadalegrimes charlieRobinson Fromano matt270avian Johnny5 al_roethlisberger BKRIV Rod.G ghost88 rk0ehn J. Chris Davis GreenMonster GreenSupreme VJD2 7901mark Snowdog Its a car part now GMFreak8 brmcm15 Hometown Hero L67 Ryan from Ohio LARRY70GS 96Super robotennis61 texasfan010 woggy Rickw Fuzzy rivboy 97rivsc lyonsperformance 1wickedninja SuperRiv07 gliderguy agood1 Karma Chicken deekster_caddy albertj Supercharged blackbart95 99 Riviera 99 IBx1 palermocorey90 mr.19982tone Jack the R 98riv RIVhorsepwr RivMan okiedrifter jimmyriv AA 97rivman RhinoFLA urbsnspices dreww SpaceBar NO 4 EVR Jason TType_Riviera turtleman pwmin jax95riv Mr.Riviera oldsman105 1998 Riv T Riley 77 posters |
|
| Author | Message |
|---|
VJD2
Fanatic

Name : Vinny
Location : Connecticut
Joined : 2010-02-21
Post Count : 310
Merit : 5
| | Subject: Re: Write-Up: Installing Boost Gauge Fri May 14, 2010 3:34 pm | |
| That sure would have been a nice easy way to hook it up instead of the other location but its not the end of the world. I'll be doing mine in the next week I hope. Just have to get some t fittings and such. | |
|
| | |
GreenSupreme
Amateur
Name : Todd
Joined : 2011-04-01
Post Count : 22
Merit : 2
| | Subject: Boost source Thu Jun 23, 2011 2:46 pm | |
| I'm installing a boost gauge, where is the best place to tap into for a boost source? | |
|
| | |
GreenMonster
Amateur
Name : Todd
Age : 41
Location : San Diego CA.
Joined : 2011-06-23
Post Count : 20
Merit : 3
| | Subject: Re: Write-Up: Installing Boost Gauge Thu Jun 23, 2011 3:00 pm | |
| ^ yea, thats me, could not find a write up for this when I searched, disregard. | |
|
| | |
J. Chris Davis
Aficionado

Name : Chris Davis
Age : 43
Location : Dixon, IL
Joined : 2010-04-14
Post Count : 1008
Merit : 19
| | Subject: Re: Write-Up: Installing Boost Gauge Thu Jun 23, 2011 3:04 pm | |
| I tapped into one of the black plastic lines in front of the firewall. That ends up going to a T connector right under the snout of the supercharger. | |
|
| | |
AA
Administrator

Name : Aaron
Age : 47
Location : C-bus, Ohio
Joined : 2007-01-13
Post Count : 18452
Merit : 252
| | Subject: Re: Write-Up: Installing Boost Gauge Fri Jan 13, 2012 12:19 am | |
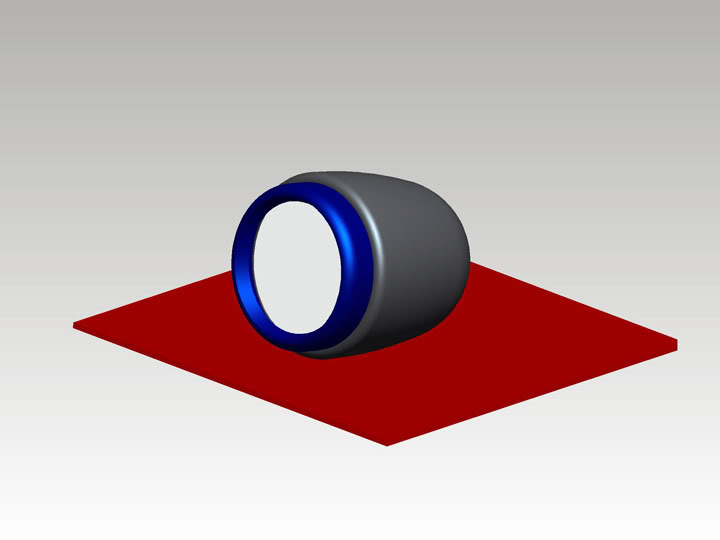
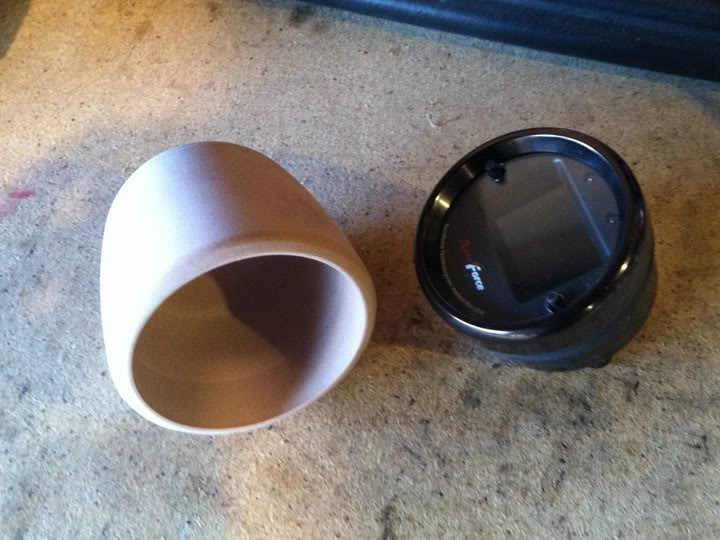
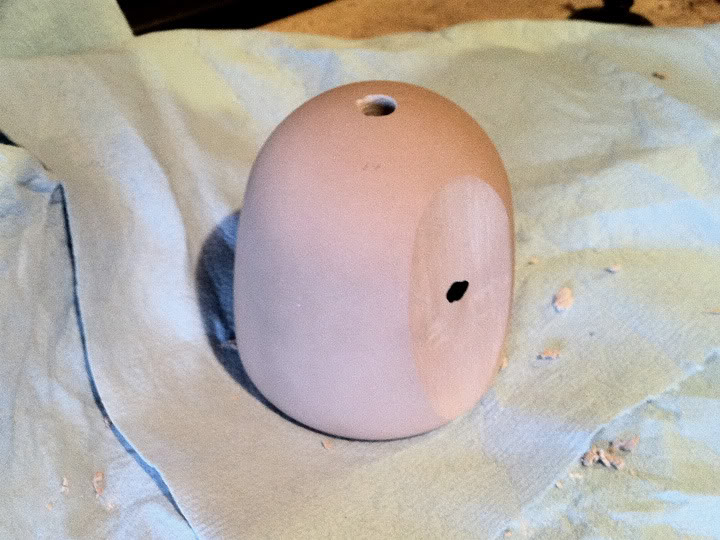
| Recently I've been considering a good location for my Aeroforce Interceptor gauge. I thought about the door vents, A-pillar, lower console, steering column, and a pod on top of the dash. I prefer the locations where I can see the gauge and keep my eyes on the road, and also want to be able to reach the buttons on the gauge easily. I like what turtle did on page 2 of this thread, so will be creating a similar pod that hopefully looks semi-stock. Here's a photo chop of how the gauge will be seen from the driver seat:  The gauge will sit in a bullet-shaped pod sunk in to the column, angled slightly upward. I took a few minutes to model the pod in CAD. I'm going to use this for cutting a foam pattern on CNC lathe:  Cross section:  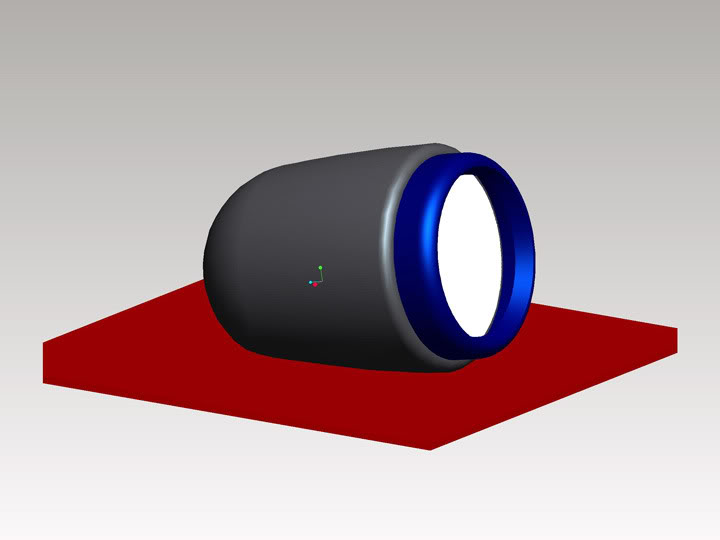 Cross section:  They way it's shown, the pod looks like it's protruding into the column panel, but it would actually be sanded flat and affixed to the panel (no cuts in OEM plastic), or I might build a custom piece using an extra column panel. This way the gauge cable could be routed through the steering column. _________________ '05 GTO 6.0L • 6-spd • 95k miles • 0-60: 4.8s • 16.9 avg MPG • Nelson Ledges Lap: 1:26'95 Celica GT 2.2L • 5-spd • 165k miles • 0-60: yes'98 SC Riviera • 281k miles • 298 HP/370 TQ • 0-60: 5.79s • ET: 13.97 @ 99.28 • 4087 lb • 20.1 avg MPG • Nelson Ledges Lap: 1:30
3.4" pulley • AL104 plugs • 180º t-stat • FWI w/K&N • 1.9:1 rockers • OR pushrods • LS6 valve springs • SLP headers • ZZP fuel rails
KYB GR2 struts • MaxAir shocks • Addco sway bars • UMI bushings • GM STB • Enkei 18" EV5s w/ Dunlop DZ101s • F-body calipers
EBC bluestuff/Hawk HP plus • SS lines • Brembo slotted discs • DHP tuned • Aeroforce • Hidden Hitch^^^ SOLD ^^^  '70 Ninety-Eight Holiday Coupe 455cid • 116k miles '70 Ninety-Eight Holiday Coupe 455cid • 116k miles^^^ SOLD ^^^ | |
|
| | |
AA
Administrator
Name : Aaron
Age : 47
Location : C-bus, Ohio
Joined : 2007-01-13
Post Count : 18452
Merit : 252
| | Subject: Re: Write-Up: Installing Boost Gauge Fri Jan 20, 2012 5:22 pm | |
| _________________ '05 GTO 6.0L • 6-spd • 95k miles • 0-60: 4.8s • 16.9 avg MPG • Nelson Ledges Lap: 1:26'95 Celica GT 2.2L • 5-spd • 165k miles • 0-60: yes'98 SC Riviera • 281k miles • 298 HP/370 TQ • 0-60: 5.79s • ET: 13.97 @ 99.28 • 4087 lb • 20.1 avg MPG • Nelson Ledges Lap: 1:30
3.4" pulley • AL104 plugs • 180º t-stat • FWI w/K&N • 1.9:1 rockers • OR pushrods • LS6 valve springs • SLP headers • ZZP fuel rails
KYB GR2 struts • MaxAir shocks • Addco sway bars • UMI bushings • GM STB • Enkei 18" EV5s w/ Dunlop DZ101s • F-body calipers
EBC bluestuff/Hawk HP plus • SS lines • Brembo slotted discs • DHP tuned • Aeroforce • Hidden Hitch^^^ SOLD ^^^ '70 Ninety-Eight Holiday Coupe 455cid • 116k miles^^^ SOLD ^^^ | |
|
| | |
AA
Administrator
Name : Aaron
Age : 47
Location : C-bus, Ohio
Joined : 2007-01-13
Post Count : 18452
Merit : 252
| | Subject: Re: Write-Up: Installing Boost Gauge Sun Feb 05, 2012 10:55 pm | |
| _________________ '05 GTO 6.0L • 6-spd • 95k miles • 0-60: 4.8s • 16.9 avg MPG • Nelson Ledges Lap: 1:26'95 Celica GT 2.2L • 5-spd • 165k miles • 0-60: yes'98 SC Riviera • 281k miles • 298 HP/370 TQ • 0-60: 5.79s • ET: 13.97 @ 99.28 • 4087 lb • 20.1 avg MPG • Nelson Ledges Lap: 1:30
3.4" pulley • AL104 plugs • 180º t-stat • FWI w/K&N • 1.9:1 rockers • OR pushrods • LS6 valve springs • SLP headers • ZZP fuel rails
KYB GR2 struts • MaxAir shocks • Addco sway bars • UMI bushings • GM STB • Enkei 18" EV5s w/ Dunlop DZ101s • F-body calipers
EBC bluestuff/Hawk HP plus • SS lines • Brembo slotted discs • DHP tuned • Aeroforce • Hidden Hitch^^^ SOLD ^^^ '70 Ninety-Eight Holiday Coupe 455cid • 116k miles^^^ SOLD ^^^ | |
|
| | |
Karma
Aficionado

Name : Andrew
Age : 40
Location : Ontario, Canada
Joined : 2008-01-14
Post Count : 1949
Merit : 123
| | Subject: Re: Write-Up: Installing Boost Gauge Mon Feb 06, 2012 9:28 am | |
| Pretty cool looking. Should look like it belongs. _________________  | |
|
| | |
AA
Administrator
Name : Aaron
Age : 47
Location : C-bus, Ohio
Joined : 2007-01-13
Post Count : 18452
Merit : 252
| | Subject: Re: Write-Up: Installing Boost Gauge Mon Feb 06, 2012 9:51 am | |
| Thanks. I could've made it look more OEM by removing the upper column cover and building in the pod, repainting the entire part for a molded look, but if you've ever removed the upper cover before, you know how much work is involved. I just couldn't see doing it for a gauge pod. This way should look acceptable, and more importantly the location will still be as functional. _________________ '05 GTO 6.0L • 6-spd • 95k miles • 0-60: 4.8s • 16.9 avg MPG • Nelson Ledges Lap: 1:26'95 Celica GT 2.2L • 5-spd • 165k miles • 0-60: yes'98 SC Riviera • 281k miles • 298 HP/370 TQ • 0-60: 5.79s • ET: 13.97 @ 99.28 • 4087 lb • 20.1 avg MPG • Nelson Ledges Lap: 1:30
3.4" pulley • AL104 plugs • 180º t-stat • FWI w/K&N • 1.9:1 rockers • OR pushrods • LS6 valve springs • SLP headers • ZZP fuel rails
KYB GR2 struts • MaxAir shocks • Addco sway bars • UMI bushings • GM STB • Enkei 18" EV5s w/ Dunlop DZ101s • F-body calipers
EBC bluestuff/Hawk HP plus • SS lines • Brembo slotted discs • DHP tuned • Aeroforce • Hidden Hitch^^^ SOLD ^^^ '70 Ninety-Eight Holiday Coupe 455cid • 116k miles^^^ SOLD ^^^ | |
|
| | |
rk0ehn
Enthusiast

Name : Christian Rolf Köhn
Age : 35
Location : CD Juarez, MX
Joined : 2011-08-11
Post Count : 148
Merit : 14
| | Subject: Re: Write-Up: Installing Boost Gauge Mon Feb 06, 2012 1:46 pm | |
| Very nice design indeed  nice job and I bet it will look awesome! | |
|
| | |
J. Chris Davis
Aficionado
Name : Chris Davis
Age : 43
Location : Dixon, IL
Joined : 2010-04-14
Post Count : 1008
Merit : 19
| | Subject: Re: Write-Up: Installing Boost Gauge Wed Feb 08, 2012 4:05 pm | |
| Very interseting. Can't wait to see the finished product. | |
|
| | |
AA
Administrator
Name : Aaron
Age : 47
Location : C-bus, Ohio
Joined : 2007-01-13
Post Count : 18452
Merit : 252
| | Subject: Re: Write-Up: Installing Boost Gauge Sat Mar 17, 2012 8:49 pm | |
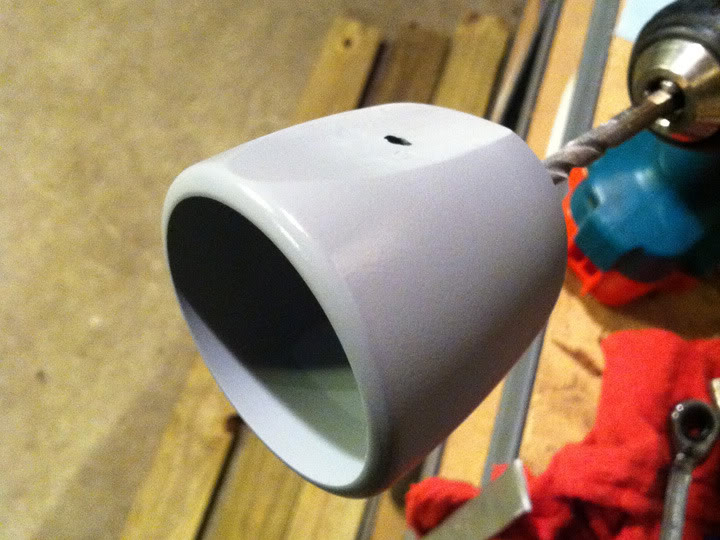
| Finally got around to painting. Used an airbrush with color-matched Valspar latex from Lowe's. Cost $3. 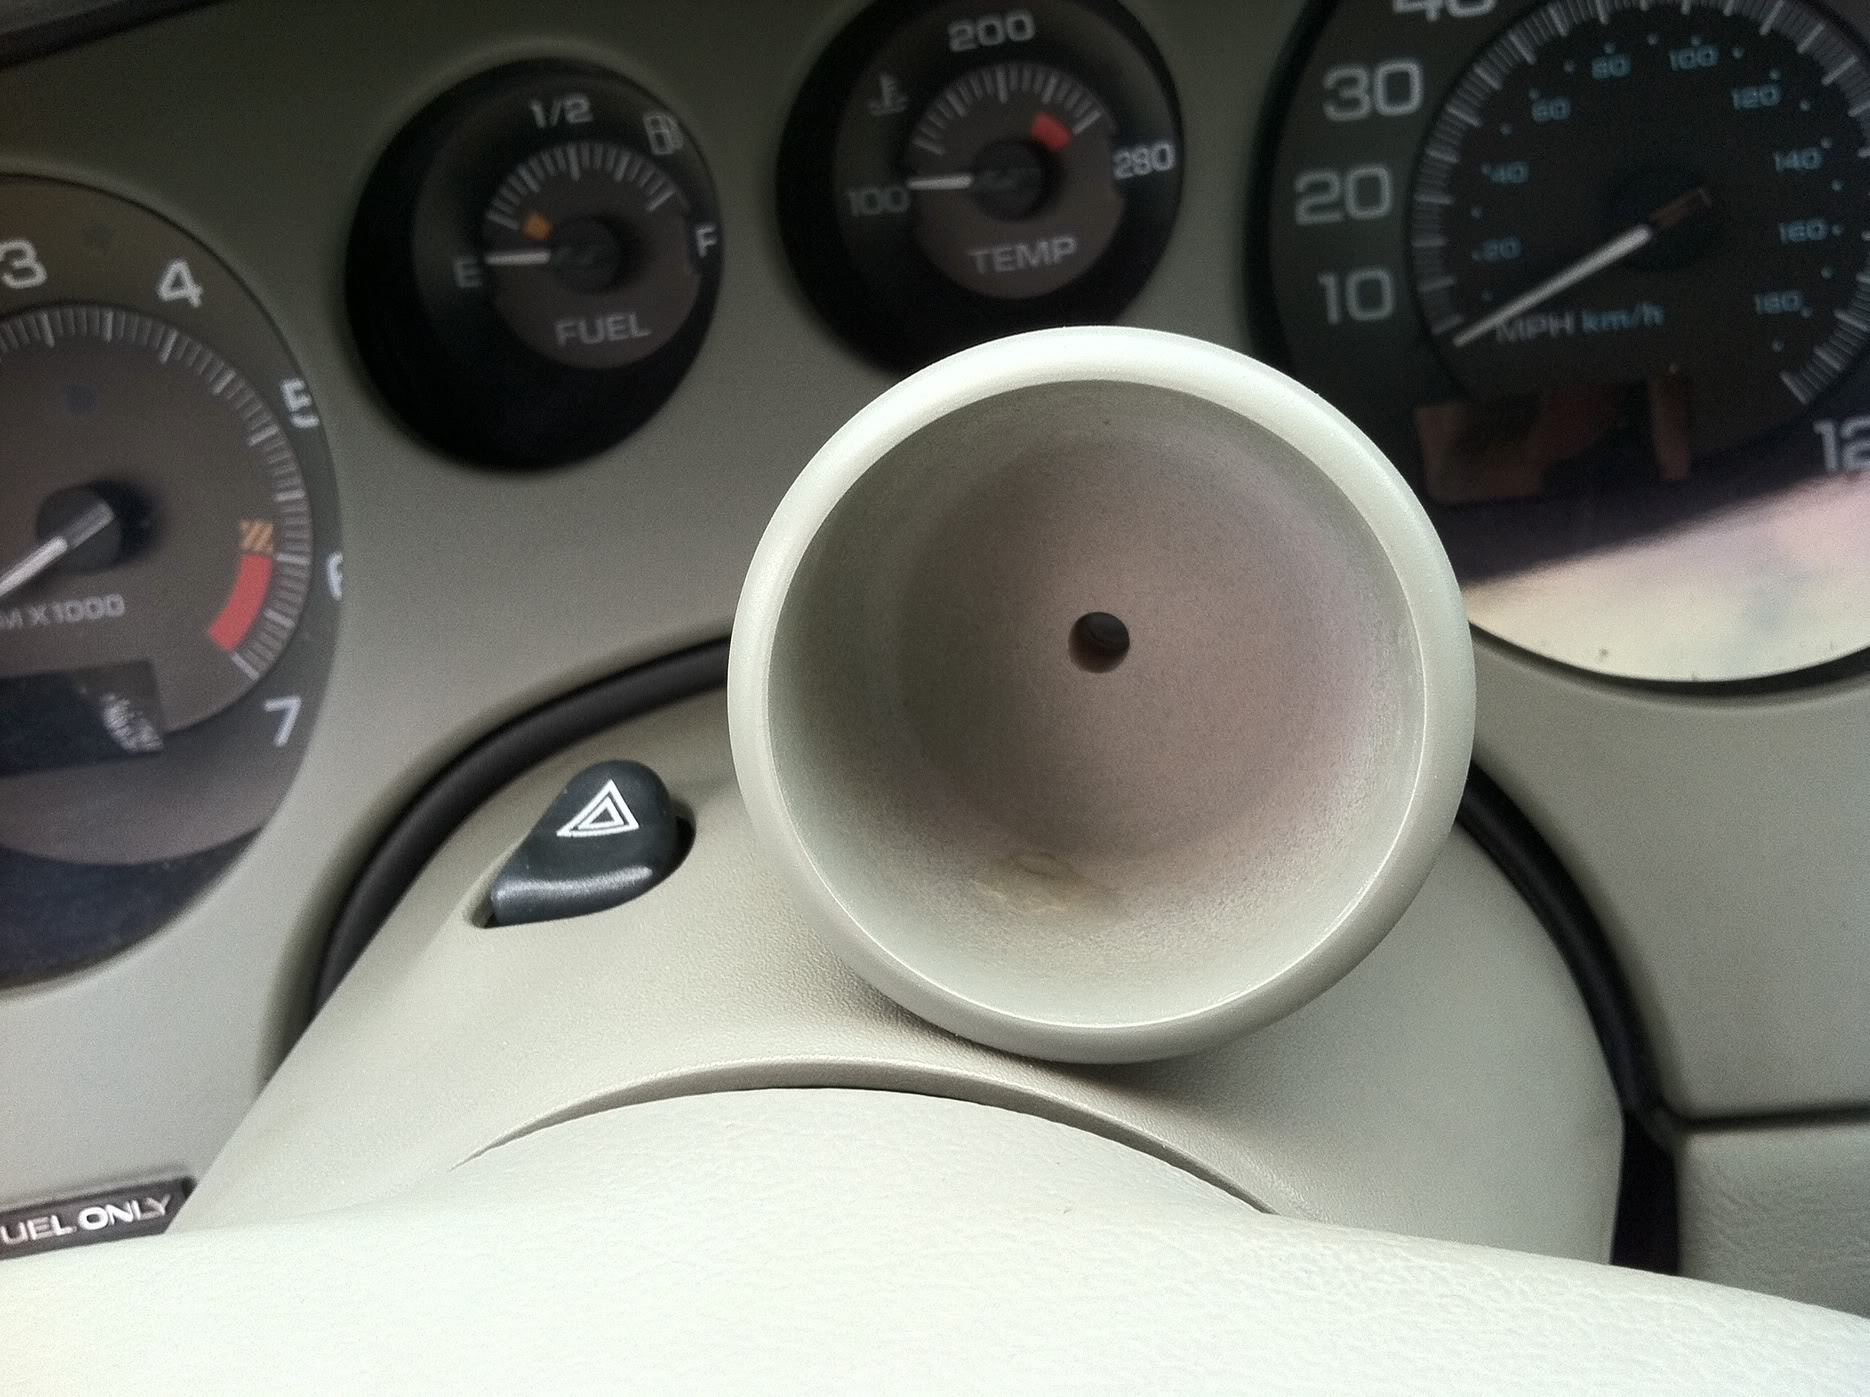 Mounted the pod to the column with epoxy. So far, it seems plenty strong.  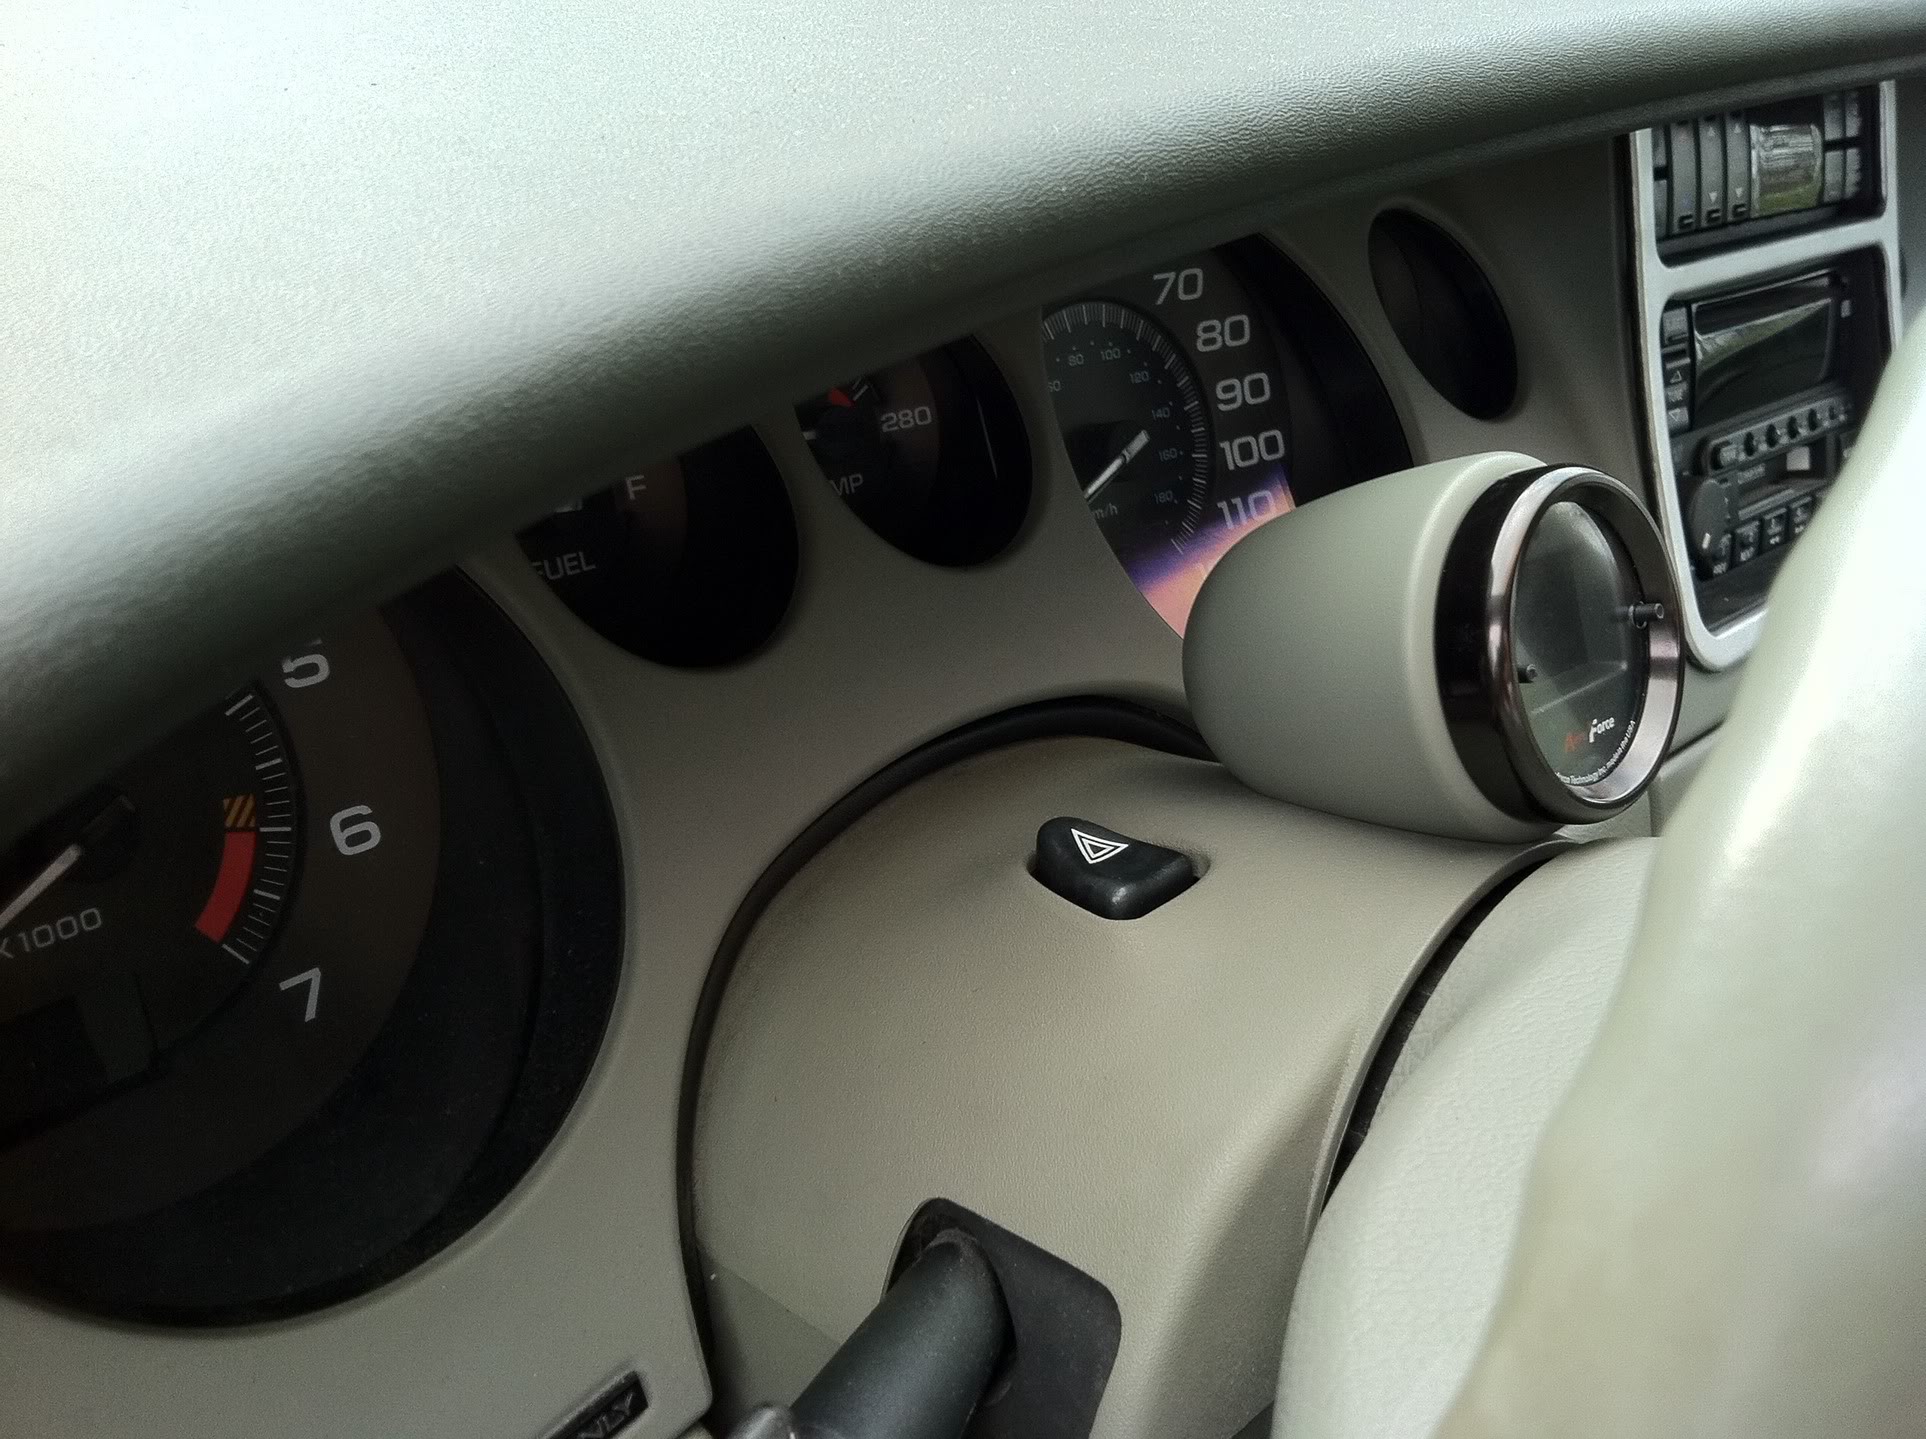  Routed the wires through the gap.  First test run!  _________________ '05 GTO 6.0L • 6-spd • 95k miles • 0-60: 4.8s • 16.9 avg MPG • Nelson Ledges Lap: 1:26'95 Celica GT 2.2L • 5-spd • 165k miles • 0-60: yes'98 SC Riviera • 281k miles • 298 HP/370 TQ • 0-60: 5.79s • ET: 13.97 @ 99.28 • 4087 lb • 20.1 avg MPG • Nelson Ledges Lap: 1:30
3.4" pulley • AL104 plugs • 180º t-stat • FWI w/K&N • 1.9:1 rockers • OR pushrods • LS6 valve springs • SLP headers • ZZP fuel rails
KYB GR2 struts • MaxAir shocks • Addco sway bars • UMI bushings • GM STB • Enkei 18" EV5s w/ Dunlop DZ101s • F-body calipers
EBC bluestuff/Hawk HP plus • SS lines • Brembo slotted discs • DHP tuned • Aeroforce • Hidden Hitch^^^ SOLD ^^^ '70 Ninety-Eight Holiday Coupe 455cid • 116k miles^^^ SOLD ^^^ | |
|
| | |
turtleman
Expert

Name : Codith
Age : 37
Location : Villa Park, IL
Joined : 2007-02-08
Post Count : 3671
Merit : 140
| | Subject: Re: Write-Up: Installing Boost Gauge Sat Mar 17, 2012 10:00 pm | |
| I almost don't believe it's AA's car from the gas level..
Looks good though. and you can still see 0-40mph range on the speedo without moving your head unlike my pod. | |
|
| | |
J. Chris Davis
Aficionado
Name : Chris Davis
Age : 43
Location : Dixon, IL
Joined : 2010-04-14
Post Count : 1008
Merit : 19
| | Subject: Re: Write-Up: Installing Boost Gauge Mon Mar 19, 2012 9:34 am | |
| | |
|
| | |
AA
Administrator
Name : Aaron
Age : 47
Location : C-bus, Ohio
Joined : 2007-01-13
Post Count : 18452
Merit : 252
| | Subject: Re: Write-Up: Installing Boost Gauge Mon Mar 19, 2012 9:57 am | |
| Thanks. Here's a daytime shot with car on and fuel level corrected! 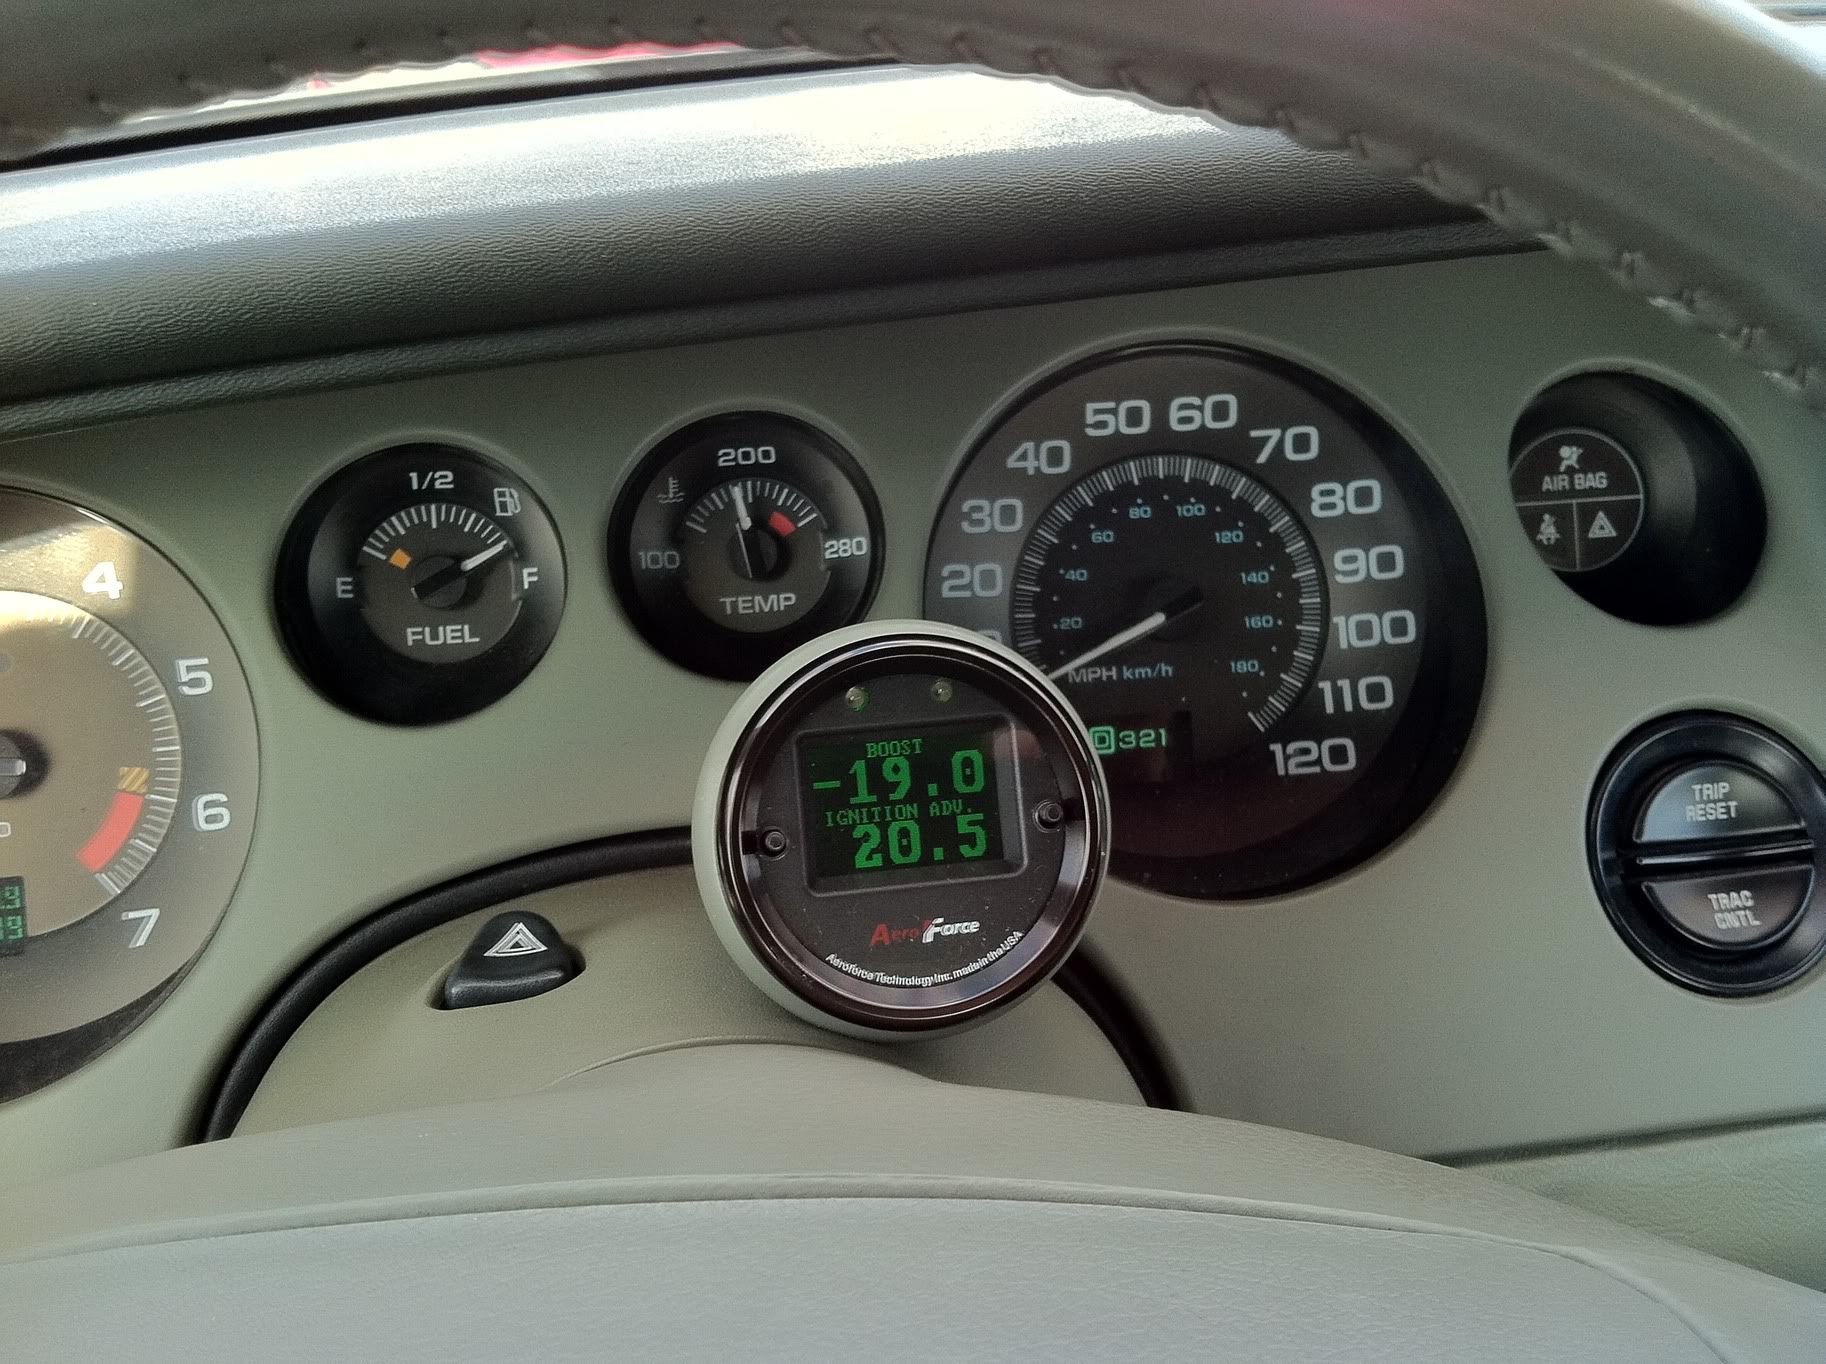 _________________ '05 GTO 6.0L • 6-spd • 95k miles • 0-60: 4.8s • 16.9 avg MPG • Nelson Ledges Lap: 1:26'95 Celica GT 2.2L • 5-spd • 165k miles • 0-60: yes'98 SC Riviera • 281k miles • 298 HP/370 TQ • 0-60: 5.79s • ET: 13.97 @ 99.28 • 4087 lb • 20.1 avg MPG • Nelson Ledges Lap: 1:30
3.4" pulley • AL104 plugs • 180º t-stat • FWI w/K&N • 1.9:1 rockers • OR pushrods • LS6 valve springs • SLP headers • ZZP fuel rails
KYB GR2 struts • MaxAir shocks • Addco sway bars • UMI bushings • GM STB • Enkei 18" EV5s w/ Dunlop DZ101s • F-body calipers
EBC bluestuff/Hawk HP plus • SS lines • Brembo slotted discs • DHP tuned • Aeroforce • Hidden Hitch^^^ SOLD ^^^ '70 Ninety-Eight Holiday Coupe 455cid • 116k miles^^^ SOLD ^^^
Last edited by AA on Mon Mar 19, 2012 10:16 am; edited 1 time in total | |
|
| | |
ghost88
Enthusiast
Name : Abe
Location : DC/DMV Area
Joined : 2009-02-25
Post Count : 146
Merit : 6
| | Subject: Re: Write-Up: Installing Boost Gauge Mon Mar 19, 2012 9:58 am | |
| what kind of led's are you using for your gauges? | |
|
| | |
AA
Administrator
Name : Aaron
Age : 47
Location : C-bus, Ohio
Joined : 2007-01-13
Post Count : 18452
Merit : 252
| | Subject: Re: Write-Up: Installing Boost Gauge Mon Mar 19, 2012 10:11 pm | |
| Just the recommended OEM lamps, no LEDs. Decided to do something about the green color, to make it more closely match the interior. I found some thin blue filter sheet at the local hobby store. A big sheet is $4.50, enough to make quite a few colored discs to insert behind the bezel ring. Tried 3 discs and found it hardly made any difference. Then tried 7, then tried 9!  Using 9 discs, and bumping the dimmer setting up to "3" on the Aeroforce, I got a pretty good result. Only problem: the entire face looked very blue during the day, so printed out a black mask sheet to hide most of the face, so only the display area shows through. Here's the before: Here's the after: 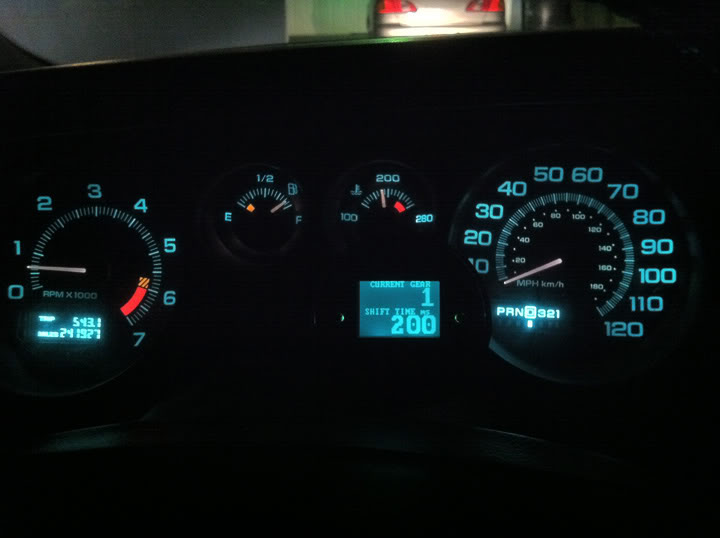 Lost a bit of contrast, but it's readable in the car. May need to remove one or two sheets after trying in the daylight. _________________ '05 GTO 6.0L • 6-spd • 95k miles • 0-60: 4.8s • 16.9 avg MPG • Nelson Ledges Lap: 1:26'95 Celica GT 2.2L • 5-spd • 165k miles • 0-60: yes'98 SC Riviera • 281k miles • 298 HP/370 TQ • 0-60: 5.79s • ET: 13.97 @ 99.28 • 4087 lb • 20.1 avg MPG • Nelson Ledges Lap: 1:30
3.4" pulley • AL104 plugs • 180º t-stat • FWI w/K&N • 1.9:1 rockers • OR pushrods • LS6 valve springs • SLP headers • ZZP fuel rails
KYB GR2 struts • MaxAir shocks • Addco sway bars • UMI bushings • GM STB • Enkei 18" EV5s w/ Dunlop DZ101s • F-body calipers
EBC bluestuff/Hawk HP plus • SS lines • Brembo slotted discs • DHP tuned • Aeroforce • Hidden Hitch^^^ SOLD ^^^ '70 Ninety-Eight Holiday Coupe 455cid • 116k miles^^^ SOLD ^^^ | |
|
| | |
Hometown Hero
Junkie

Name : Klix
Age : 46
Location : Barrhead, Alberta Canada
Joined : 2009-11-18
Post Count : 807
Merit : 16
| | Subject: Re: Write-Up: Installing Boost Gauge Tue Mar 20, 2012 12:08 am | |
| Looks great! Nice fit n finish. | |
|
| | |
Rod.G
Rookie

Name : Sherrod
Age : 51
Location : Bolingbrook,Il.
Joined : 2012-04-12
Post Count : 16
Merit : 0
| | Subject: Boost Fri Apr 20, 2012 11:00 am | |
| How's it going? Got a question...in regards to getting a boost reading, what line would I hook a boost gauge to? Not yet interested in a permanent install right now. I know I'm not getting the standard 7-9 psi. but I did want to know exactly what I'm gettin right now. Can anyone help? | |
|
| | |
Karma
Aficionado
Name : Andrew
Age : 40
Location : Ontario, Canada
Joined : 2008-01-14
Post Count : 1949
Merit : 123
| | Subject: Re: Write-Up: Installing Boost Gauge Fri Apr 20, 2012 11:12 am | |
| Page 5 of this thread has a pic for you.
_________________ | |
|
| | |
LARRY70GS
Aficionado

Name : Larry
Age : 68
Location : Oakland Gardens, NY
Joined : 2007-01-23
Post Count : 2193
Merit : 150
| | Subject: Re: Write-Up: Installing Boost Gauge Fri Apr 20, 2012 2:54 pm | |
| - Rod.G wrote:
- How's it going? Got a question...in regards to getting a boost reading, what line would I hook a boost gauge to? Not yet interested in a permanent install right now. I know I'm not getting the standard 7-9 psi. but I did want to know exactly what I'm gettin right now. Can anyone help?
Below the supercharger snout is a vacuum tee with 2 vacuum lines. The back one goes across the rear valve cover. Tee into that line.
_________________
98 Riviera SC3800 All stock except gutted air box.
1970 Buick GS455 Stage1, TSP built 470BBB, 602HP/589TQ
Best MPH, 116.06 MPH, Best ET, 11.54
https://www.youtube.com/watch?v=UHCda-t_Jls
https://www.youtube.com/watch?v=sfT2tEO4XcU
| |
|
| | |
Karma
Aficionado
Name : Andrew
Age : 40
Location : Ontario, Canada
Joined : 2008-01-14
Post Count : 1949
Merit : 123
| | Subject: Re: Write-Up: Installing Boost Gauge Fri Apr 20, 2012 3:01 pm | |
| - LARRY70GS wrote:
- Rod.G wrote:
- How's it going? Got a question...in regards to getting a boost reading, what line would I hook a boost gauge to? Not yet interested in a permanent install right now. I know I'm not getting the standard 7-9 psi. but I did want to know exactly what I'm gettin right now. Can anyone help?
Below the supercharger snout is a vacuum tee with 2 vacuum lines. The back one goes across the rear valve cover. Tee into that line. But not if you have the series 1 sc with the m62. In that case use the spot that is in the page 5 of this thread. _________________ | |
|
| | |
LARRY70GS
Aficionado
Name : Larry
Age : 68
Location : Oakland Gardens, NY
Joined : 2007-01-23
Post Count : 2193
Merit : 150
| | Subject: Re: Write-Up: Installing Boost Gauge Fri Apr 20, 2012 3:23 pm | |
| - Karma wrote:
- LARRY70GS wrote:
- Rod.G wrote:
- How's it going? Got a question...in regards to getting a boost reading, what line would I hook a boost gauge to? Not yet interested in a permanent install right now. I know I'm not getting the standard 7-9 psi. but I did want to know exactly what I'm gettin right now. Can anyone help?
Below the supercharger snout is a vacuum tee with 2 vacuum lines. The back one goes across the rear valve cover. Tee into that line.
But not if you have the series 1 sc with the m62. In that case use the spot that is in the page 5 of this thread. Absolutely right. I didn't check, and Rod didn't put his year Riviera in a signature.
_________________
98 Riviera SC3800 All stock except gutted air box.
1970 Buick GS455 Stage1, TSP built 470BBB, 602HP/589TQ
Best MPH, 116.06 MPH, Best ET, 11.54
https://www.youtube.com/watch?v=UHCda-t_Jls
https://www.youtube.com/watch?v=sfT2tEO4XcU
| |
|
| | |
AA
Administrator
Name : Aaron
Age : 47
Location : C-bus, Ohio
Joined : 2007-01-13
Post Count : 18452
Merit : 252
| | Subject: Re: Write-Up: Installing Boost Gauge Sat Apr 21, 2012 2:07 pm | |
| Now fixed, thanks Rod! _________________ '05 GTO 6.0L • 6-spd • 95k miles • 0-60: 4.8s • 16.9 avg MPG • Nelson Ledges Lap: 1:26'95 Celica GT 2.2L • 5-spd • 165k miles • 0-60: yes'98 SC Riviera • 281k miles • 298 HP/370 TQ • 0-60: 5.79s • ET: 13.97 @ 99.28 • 4087 lb • 20.1 avg MPG • Nelson Ledges Lap: 1:30
3.4" pulley • AL104 plugs • 180º t-stat • FWI w/K&N • 1.9:1 rockers • OR pushrods • LS6 valve springs • SLP headers • ZZP fuel rails
KYB GR2 struts • MaxAir shocks • Addco sway bars • UMI bushings • GM STB • Enkei 18" EV5s w/ Dunlop DZ101s • F-body calipers
EBC bluestuff/Hawk HP plus • SS lines • Brembo slotted discs • DHP tuned • Aeroforce • Hidden Hitch^^^ SOLD ^^^ '70 Ninety-Eight Holiday Coupe 455cid • 116k miles^^^ SOLD ^^^ | |
|
| | |
BKRIV
Enthusiast

Name : Bill
Location : Sandusky Ohio
Joined : 2007-11-22
Post Count : 160
Merit : 4
| | Subject: Re: Write-Up: Installing Boost Gauge Wed Apr 25, 2012 1:24 pm | |
| I have been waiting to see a boost gauge installation in the the cd holder location, so far all I have been able to find is window pillar, door air vent, steering column and ashtray... has anyone done this? I dont like to be the first especially where there are cheap little plastic clips involved. | |
|
| | |
Sponsored content
| | Subject: Re: Write-Up: Installing Boost Gauge | |
| |
|
| | |
| | Write-Up: Installing Boost Gauge | |
|